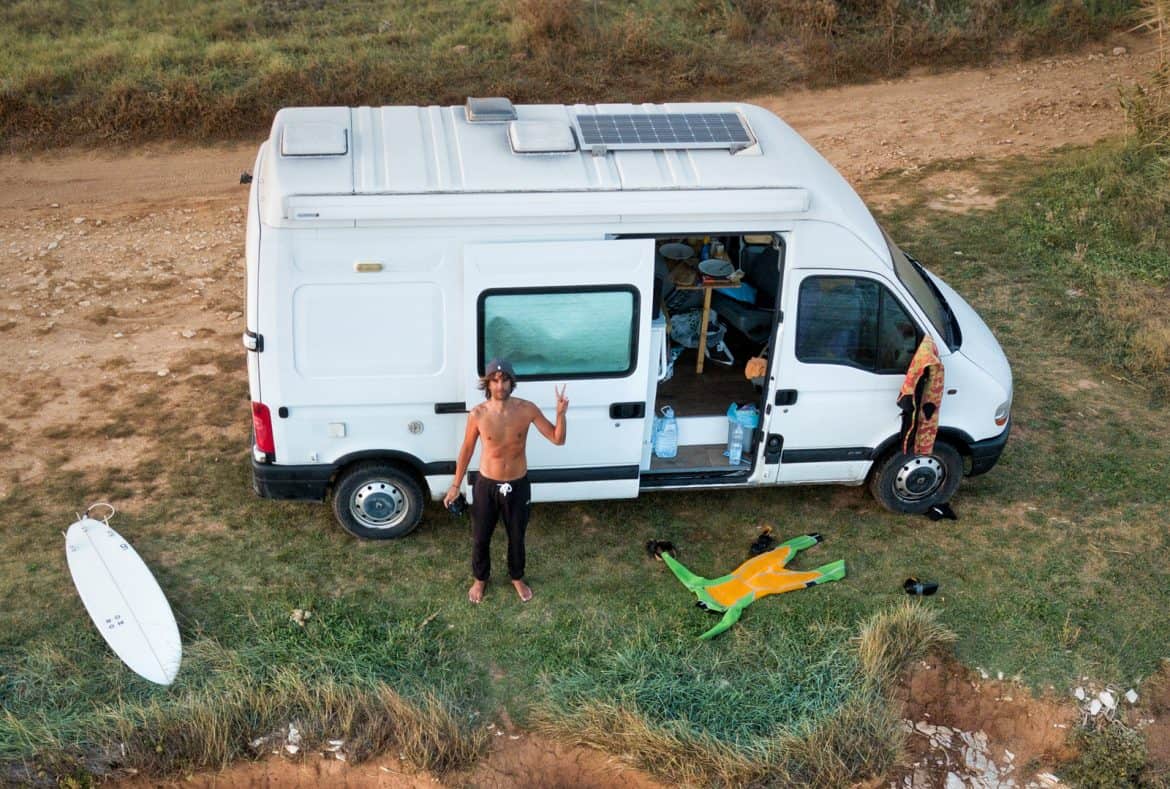
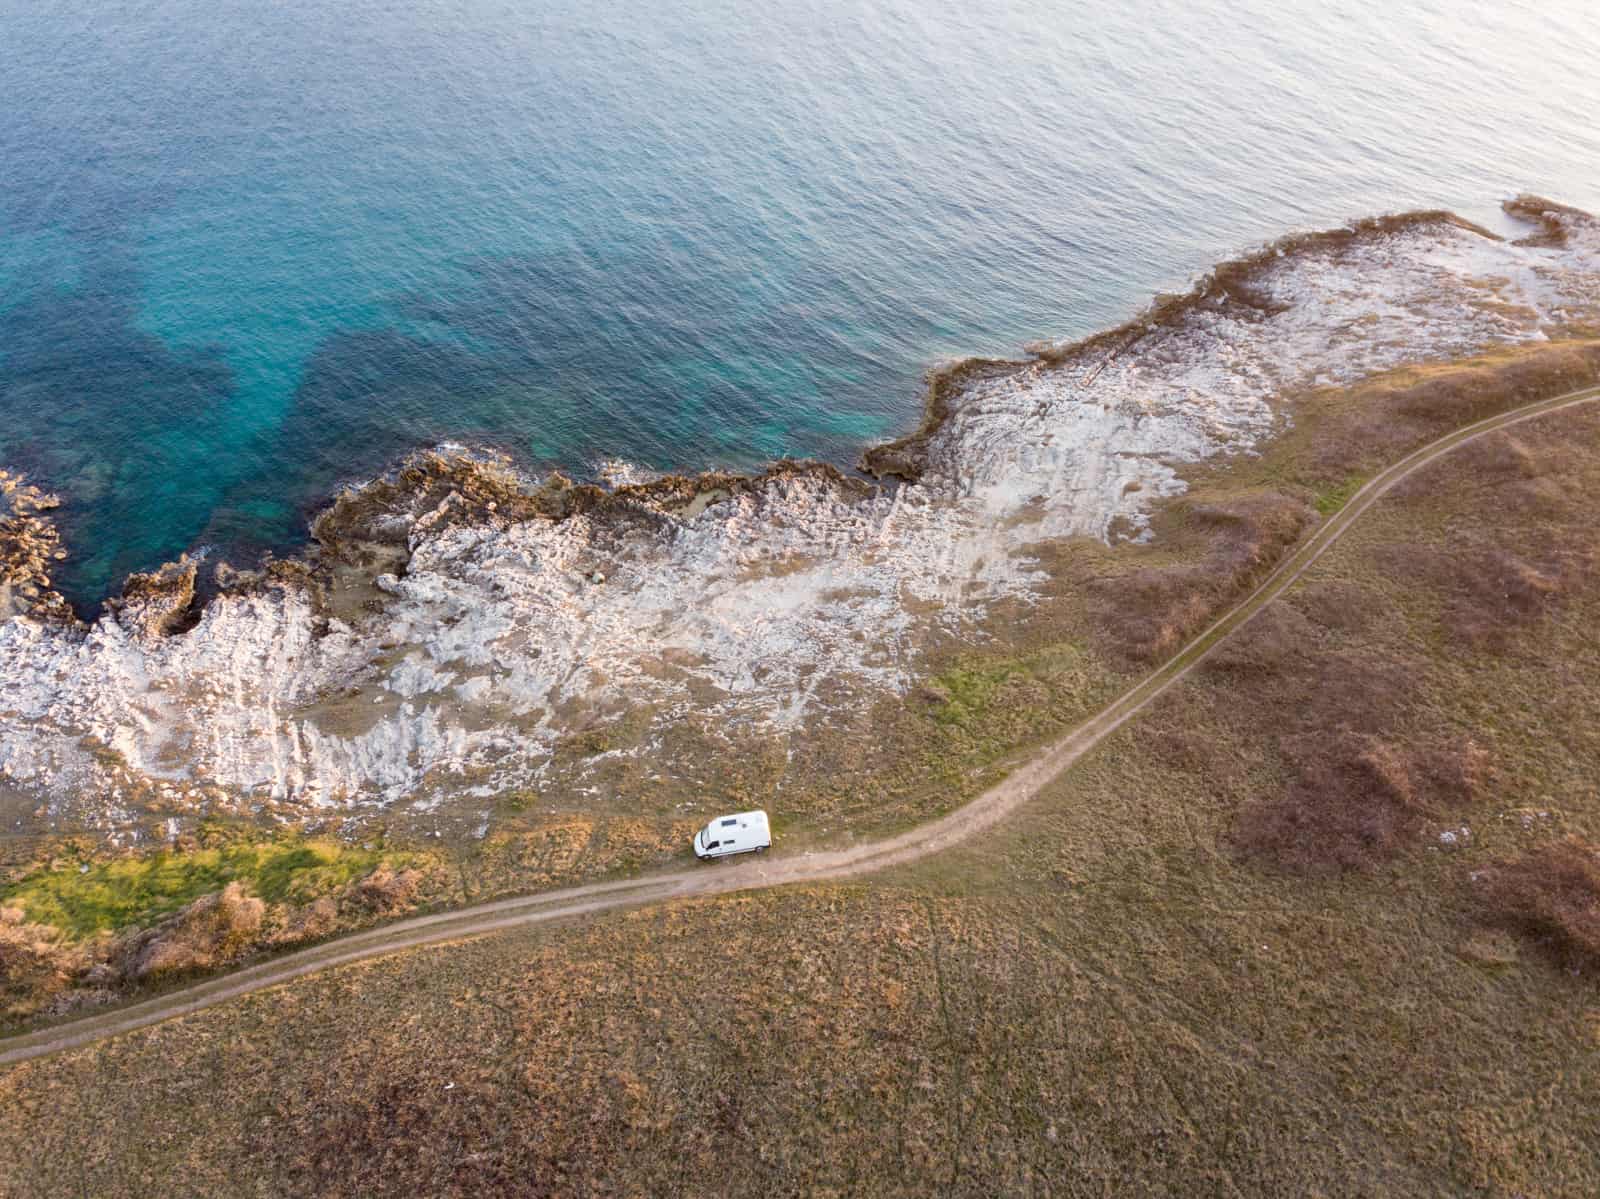
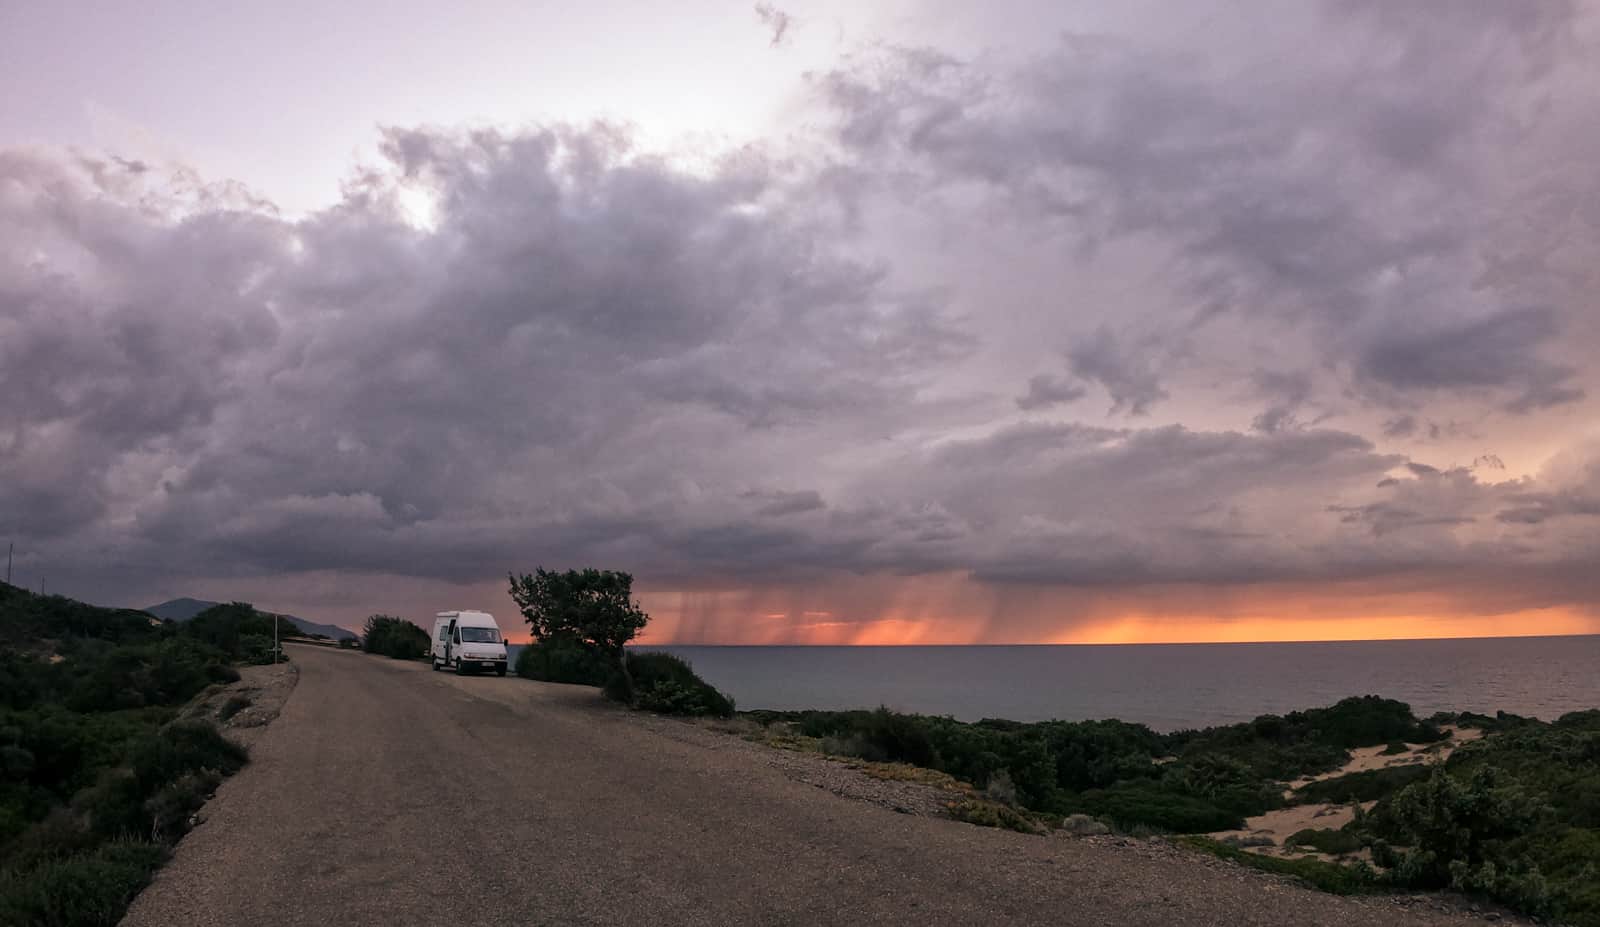
The basic idea of owning a van is simple. There might even be a photo of van life under word simple in English dictionary. But when you actually get into buying/converting a van things very quickly become complicated. A van is not just a car, it is a house on wheels with all sorts of equipment that a beginner van owner usually has no idea how it works. This is especially important if you get an older used van. Every van owner, like it or not, soon becomes a maintenance man. Knowing how things work when something breaks is essential. And things will break down all the time. Same is true if you want to make any upgrades to your van. When I got my van a year and a half ago I had no idea. During my first van trip to Sardinia I had more problems than there are #vanlife influencers on IG :). I was also really lucky that the van I bought is just the perfect van for my needs. Soon I started receiving questions about my van setup, batteries, solar… from various people. This is why I have decided to write this camper van guide for beginners. It covers pretty much everything you need to know as a van first timer to start you van purchase, van build, van life or van trip and it explains all the things I wish someone had told me when I was buying my van. Enjoy!
Table of Contents
What Is the Best Van Size for Camper Van Conversion?
There is no single best size because people’s needs are different. But here are some truths and facts that will help you find your own best van size.
Size vs. Maneuverability
Van size is obviously a trade off between having lots of space inside the van and having a van that is maneuverable and can take you anywhere you wish. As the van gets larger exploring narrow dirt roads leading to empty beaches becomes harder and harder. It is not the driving itself, even bigger vans drive almost like a regular car and are not that much wider (motor homes are however another thing). The main problem is that a big van needs a lot of space to turn around. So if the narrow road doesn’t end with a parking lot where you can turn around, there is no other option than to drive in reverse the whole way. Not a fun thing to do and nothing like driving in reverse with a car.
Different people use vans differently so it is up to you to decide what do you want out of your van.
Get a smaller van if you:
- prefer driving off the main roads exploring the countryside,
- want to get away from other people,
- want to explore wilderness, coastlines, driving on dirt roads, looking for hidden corners, checking out surf spots…, basically if you want to be able to drive everywhere where a regular car can drive,
- want to be stealth, unseen and mix with other cars and disappear,
- like to drive around a lot, stopping and sleeping at a different spot every day,
- want to navigate tiny old towns and city centers.
Get a bigger van if you:
- think that comfort comes first,
- will spend a lot of time in the van or even live in your van,
- will use the van in winter time and in bad weather,
- are not that much into exploring and dirt roads,
- stick to official camping grounds and camper van stops,
- like to park your van and then stay in the same place the whole time,
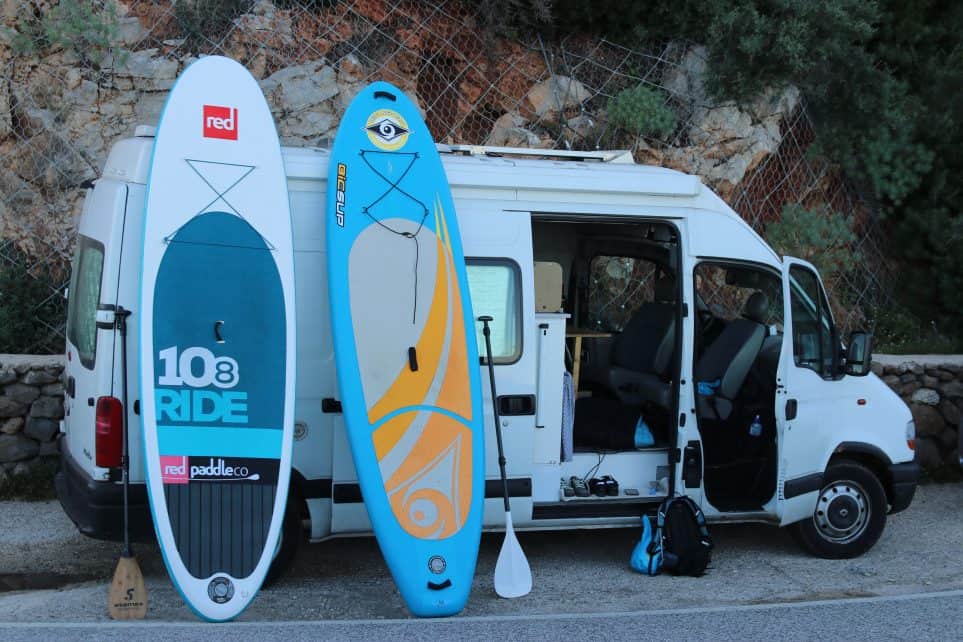
- have lots of gear that you take on the trip (surfboards, mountain bikes, kayaks, stand up paddle boards etc…).
Now lets get more specific.
Camper Van Length
Shorter than 5m (L1)
These vans are not much bigger than bigger SUVs, pick up trucks or station wagons. They drive as a car and don’t need much room to turn around. You can get almost anywhere with them. The downside is of course they area not very spacious.
Vans Between 5m and 6m (L2 and L3)
You would not believe how much difference 1m makes when it comes to interior space as well as when it comes to driving. Between 5.5 and 6m you can find full blown vans that have all the equipment of a motor home including a shower. When you go over 5.5m you will have to start thinking ahead and using your navigation and Google maps to decide if turning onto that narrow road is a good idea. But with some getting used to, you can still use these vans to go almost everywhere. Vans up to 6m can also be parked in most of the regular parking spaces which is a big plus. You can go shopping, you can go to the city center etc… In the United States roads and parking spaces tend to be bigger so this is even less of a problem with this kind of van.
Vans over 6m (L4)
Now we are talking motorhome lengths. This means lots of comfort inside the van, but forget about exploration and tiny roads. Big vans are happiest when they are parked in a big parking lot. Vans like these won’t fit into regular parking spaces so you will usually have to look for empty parking lots or camper van rest stops. It helps if you bring your own bikes so you can park and then you use a bike to go the last mile.
Camper Van Height
When it comes to van height again there are some trade offs. The main issue here is: “Can you stand up in a van?” and will you get stuck under height restriction barriers in different parking lots, beaches, supermarkets etc… The ability to stand up straight in the van makes a huge difference when you have to spend some time inside. There are 4 different types of roofs/roof heights, each with its own pros and cons:
Normal Van (H1)
A normal van without a raised roof:
- blends with the traffic and other cars
- lower gas consumption and air resistance
- height restriction barriers are not a problem
- no standing in the van (this is really annoying if you have to spend more time inside the van)
- less space
Normal Van with a Pop Top Roof
A pop top roof, also called pop up roof or elevating roof is a roof that you put down when travelling and put up when you are camping.
- blends with the traffic and other cars
- lower gas consumption and air resistance
- height restriction barriers are not a problem
- you can stand up straight in a van
- not suitable for cold weather
- stronger winds can bend it
- expensive
- still less space that a hard raised roof.
Raised Roof (H2)
A van with a raised roof has higher hard shell roof that can not be removed. These come in different heights. It is also possible to get a camper van custom roofs that are custom shaped for camper vans, but these are usually seen in older camper van. These days everybody just goes with the factory roof.
- you can stand up straight in the van
- a lot more storage space (you get lots of storage space since you can install floor to roof cabinets or even just top cabinets)
- more suitable for cold weather
- higher gas consumption and air resistance
- height restriction barriers can stop you from reaching some parking lots, beaches and supermarkets (depends on the height of the barrier, if it’s 2.2m it can still be ok)
- it’s more obvious that you have a camper van.
Double Raised Roof (H3)
Same as raised roof, just higher.
- you can stand up straight in the van
- you can have a double floor with crazy amount of storage under your feet (think surfboards, skis, snowboards etc… and also water tanks) that also acts as extra insulation for cold weather or
- you can have bunk beds so more people can sleep in the van without having to prepare the bed every evening
- more suitable for cold weather
- higher gas consumption and air resistance
- height restriction barriers can stop you from reaching some parking lots, beaches and supermarkets
- every now and then you will also be to high for some really low tunnels and underpasses (not very often)
- it’s more obvious that you have a camper van.
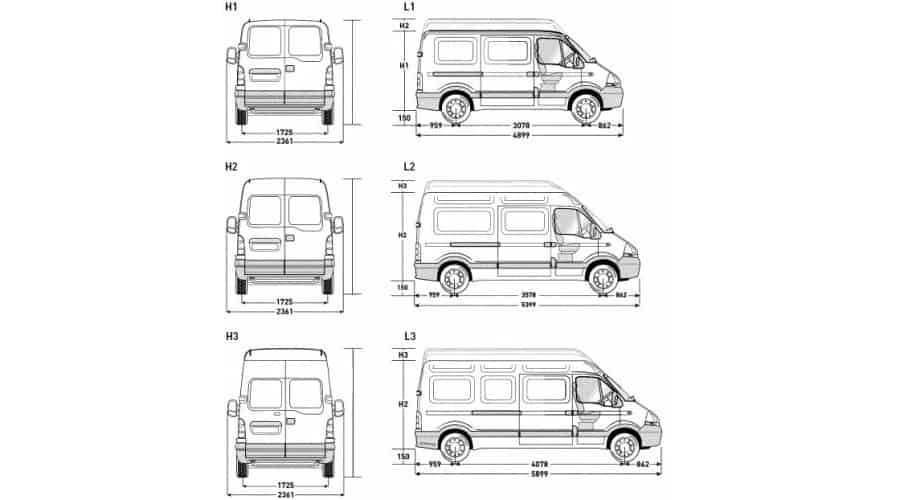
The HL Van Size Codes
In Europe vans are often labeled with codes in LH format. L meaning length and going from L1 (shortest) to L4 (longest) and H meaning height going from H1 (lowest) to H4 (highest). This means L1H1 van is the shortest and lowest and L4H4 is the longest and highest. You can also have combos like L3H2 etc… Dimensions for these codes are not set in stone. They differ from manufacturer to manufacturer and from van model to van model, so they are more like general guidelines. In US lengths and heights are usually given using measurements.
Van Layout
Same as with van size, van layout is more or less a personal preference. The best camper van layout is always the layout that is best for your needs and depends on how you will use the van. How much and what sport equipment do you want to carry with you, how much storage space you need, what looks good to you etc… My suggestion, if you are buying a camper van or thinking about building your own, is to check out as many different layouts as you can. Head over to Pinterest, there are loads of van photos there, there are some Instagram accounts dedicated to van layouts (like this one), there are loads of videos of people explaining their vans on YouTube, talk to people that already own a van and ask them if you can check it out, go to camper van dealers and check out new vans, checkout classifieds for used camper vans and backpacker cars and go and have a look etc…
But! Don’t be fooled by the looks. A really sick looking van photo on Instagram, you know the one, lots of rustic wood panels, open spaces, Mexican blankets and plants in pots. Some layouts might look awesome in photos, but are not very useful. So make sure you also rent a van and go on the kind of trip you will most often be doing. This will help you figure out what you really need in a van.
Even though the layout is a personal preference I can still list a few truths and facts in this camper van guide, that influence the layout quite a lot.
Bed Orientation and Making Your Bed Every Evening
If your van is wide enough and you are not super tall then my suggestion would be to fit the bed across the width of the van. This frees up an unbelievable amount of space in comparison to a bed that has to be set along the length of the van. How wide is wide enough? The bed in my van is a little over 180cm long and 140cm wide. I am 182cm and I have no problem sleeping without going diagonal. I can be completely extended sleeping on my back. If you sleep on your side you are never fully extended anyway so there is even room to spare in this case. The only problem is sleeping on your stomach when your feet extend making you longer than your height.
If you are going to build the van yourself also take into the consideration that some of the van width is used for insulation and walls (depending on how you will build the van).
A huge plus in a van is also if you do not have to set up and make your bed every night. Some people like the open space that you get if your bed folds into a couch, but it is so much more convenient to be able to go to sleep whenever you want. This option also depends on the size of the van. If your van is smaller and there is not much room left once the bet is set, then folding the bed into a couch is a great idea.
Bathroom (Shower and Toilet) in a Camper Van, Yes or No?
Available Space
Obviously fist you have to ask yourself if your van is big enough to have a bathroom. You can find showers in vans that are above 5.5m in length and have a raised hard roof (L3H2). Anything smaller than that and putting in a shower becomes almost impossible. Vans with showers almost always also have a toilet included in the shower. Camper van shower/toilet usually looks like an over sized closet. The inside is waterproof, so the whole space can get wet (toilet included) without water coming out and into the van.
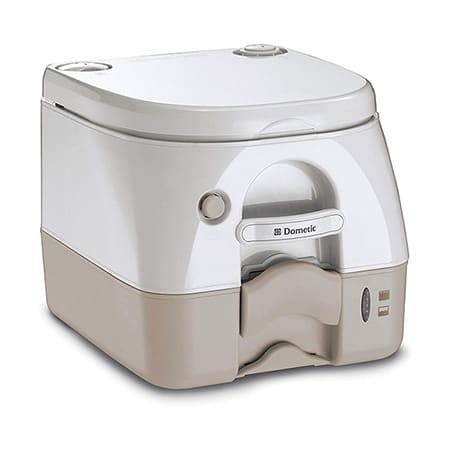
If your van is smaller than that, then people usually opt for an outdoor shower. External shower works great in the warm part of the year. Even vans with internal shower often have external shower connectors, because showering outside is really practical (wash off the sand and dirt). But when it gets colder you have to be quite hardcore to make it work. For toilet, a portable camping toilet (the porta-potti) fits almost everywhere, also in a smaller van. People usually push it under the bed or into a designated drawer and then pull it out when needed. There is a lack of privacy if your toilet is not in a separate room, but lots of people still go for it.
Do I Recommend Camper Van with a Shower/Toilet?
Hell yes!! In my personal opinion an indoor shower in a camper van is one of the best things you can have in a van. It is that final thing that makes a camper van your true home on wheels and makes you totally independent. For me a shower is also at least 10 times more useful than a toilet. There are loads of toilets everywhere you go. Public restrooms, supermarkets, bars, restaurants, gas stations… and if you spend most of your van trip in nature there is always the shovel method. Finding a shower is however way harder. So in my opinion having a shower is totally worth it. It does take up lots of space though. It also makes van build or maintenance more complicated. To help you decide I wrote the pros and cons of a camper van bathroom as I see them:
- there is nothing better than taking a hot shower after a long day of doing whatever you are doing :)
- bathroom acts as an extra storage space for large items, I can put 2-3 surfboards there, it’s best for big items that can be then moved quickly when bathroom is needed (surfboards, stand up paddle boards etc…)
- bathroom acts as a quick storage for all the wet items like wetsuits, swimsuits etc… you come out of the water and just throw the wetsuits in the shower
- bathrooms usually have their own heating vent which means that the small shower space will get super hot when the heating is on. If you would want to design a custom made wetsuit drier room then the van bathroom would be it. My wetsuits are always completely dry in the morning.
- camper van bathroom takes up lots of space
- it makes the van plumbing and van maintenance more complicated
- you will need larger fresh water tank (also called white water tank) and also larger waste water tank (also called gray water tank, tank for water that comes out of your sink and shower)
- you might need another waste tank, the black water tank (tank for stuff that goes into the toilet). Camper vans usually don’t have black water tanks because simpler toilet designs are available (toilets with removable cassette).
- cold weather and sub zero temperatures can cause problems, you don’t want the water in your pipes and tanks to freeze (more on that later on).
Swivel Seats
If your front seats can be turned around you will again gain a huge amount of extra space. By using swivel seats the drivers cabin is turned into a living room (unless the cabin and the back of the van are not on the same height). Swivel seats work great in any type and size of van. They are standard in “official” van builds, but lots of home builds lack these.
Camper Van Furniture
It’s up to you what kind of cabinets and storage space you want in your van. A few pointers that I can give you here:
- If possible use lighter materials, lighter van is better than a heavy one (no marble counter tops and stupid shit like that!).
- Always keep in mind that when you are driving it is like there is an earthquake in your home. Cabinets must be built solid and firmly attached to the van!
- Also, when you are driving things are flying and moving all over the place. Make sure all your drawers and cabinet doors can be locked shut! Push locks are a great idea.
The rest of the layout is completely up to you.
Camper Van Heating
Heating
Depending on where you live, heating can hugely increase the season when your van is usable. Van heating has nothing to do with heating we know from regular cars. Regular heating only works when the car is running and the engine is hot. Camper van heating is a separate system that keeps the van warm when the van is parked (some also work while driving). With some insulation and good heating system you can use the van throughout the year, even in winter. More on that later when we come to van insulation. There are a couple of different van heating systems, but imho only two are worth installing – diesel/gas heating and propane heating. Here are the pros and cons of each system.
Diesel/Gas Camper Van Heater (Webasto)
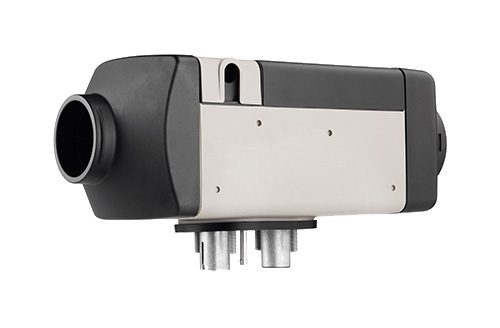
Webasto is the most well known brand here, so sometimes these heaters are called simply webasto heaters even though there are loads of other brands as well. These heaters are small in size and run on diesel or gas that they get from your cars gas tank. A typical diesel heater requires 0.1 litres diesel per hour. There is a spark plug inside the heater that ignites the gas which then burns and heats the air. This air is then blown throughout the van through pipes using fans. Spark, thermostat and fan need 12V electricity from leisure battery (more on that later). The electricity consumption depends on the heating power needed and the type of heater (usually 10 to 50w).
- small in size
- can be mounted externally so it takes no space inside the van
- when mounted externally you don’t need to worry about exhaust
- you can fill it up by simply filling your gas tank at any gas station and you can check how much fuel is left simply by checking the gas gauge
- is uses more electricity as the spark plug needs power to ignite the gas
- it is noisier than the propane heater
- usually it doesn’t come with a water heater so you will need an extra water heater in the van if you want hot water (some models also come with warm water option)
Propane/Butane Camper Van Heater (LPG heater)
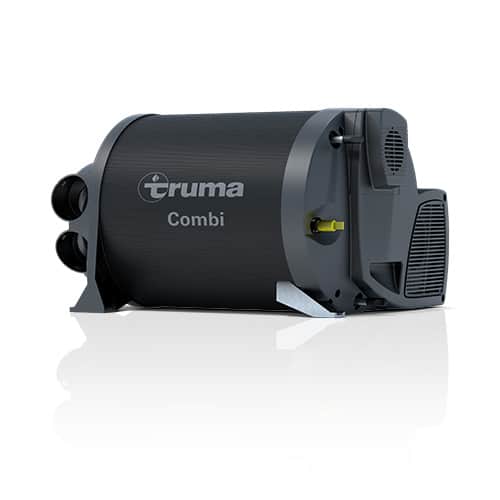
This heater uses propane or butane gas (usually they can use both). Two most popular brands are Propex and Truma. These are usually installed inside the van. They use either propane bottles or an underslung LPG tank that can be filled up at gas stations. The tank option makes filling up gas much more convenient and it leaves you more space inside your van. On the other hand it’s substantially more expensive and more difficult to install. A propane heater uses around 150 grams of gas per hour to heat an average sized van. For both the diesel and the propane heater these numbers are greatly influenced by outside temperatures and van insulation, so take these very very very loosely. Both Truma and Propex have models that come with water heater included. These heaters (always if the water heater is included – danger of freezing if mounted outside) are usually installed inside the van. They need an exhaust pipe going out of the van and fresh air intake pipe.
- it’s an all in one solution, you will need gas for cooking and warm water even if using diesel heater
- starts heating very quickly
- works in very cold temperatures (with propane gas)
- using propane/butane in the van requires professional installation
- propane bottles are harder to buy than diesel gas
- propane bottles in different countries are usually not interchangeable (you will need to refill yours instead of exchanging you empty bottle for a full one) and also different countries have different connection valves (you can get an adapter). This is more of an Europe problem, if you want to travel in Europe you usually cross a few countries. If you travel across USA you are fine.
Other Heating Methods – Wood, Electricity
There are special woodburning stoves that can be used in a van. I would say people use them primarily because of that special feeling we get near fire. Otherwise they are not that practical. Another upside of the wood burners it that they take the moisture out of the air – they produce dry heat. This is great because humidity inside of the van can be a problem (more on that later).
Electric heaters are small and safe 12v units that only have one HUGE downside. They use a huge amount of electricity. Unless your are using an external hookup to the electric grid they will drain your leisure batteries in no time. Running an electric heater on leisure batteries would require a big investment into batteries and solar panels. Check the electricity section for more info.
Which heating solution do I suggest? I have a Truma Combi warm air heater with integrated hot water tank and I am very happy with it. It helped us survive some really cold nights without a problem (our van is not very well insulated).
Heating and Safety
Make sure you have a small fire extinguisher in your camper van in case of a fire. Depending on the heating method it can be more or less likely (in any case highly unlikely) that carbon monoxide (CO) starts to accumulate. Because carbon monoxide is a odorless and tasteless gas that is extremely dangerous, it is a good idea to get a carbon monoxide sensor for your camper van.
Water and Plumbing
Whatever size and shape your van is, you will need water. From simply using big water jugs from the store to full internal plumbing with hot water. Everything is possible. This part of the camper van guide lists the systems people are using from the simplest to the most complex.
Water Bottles and Jugs
The most simple “system” without any plumbing. You buy bottled water in the supermarket and you use it. Get a plastic wash basin and use it to do your dishes. Throw the water outside and you are done.
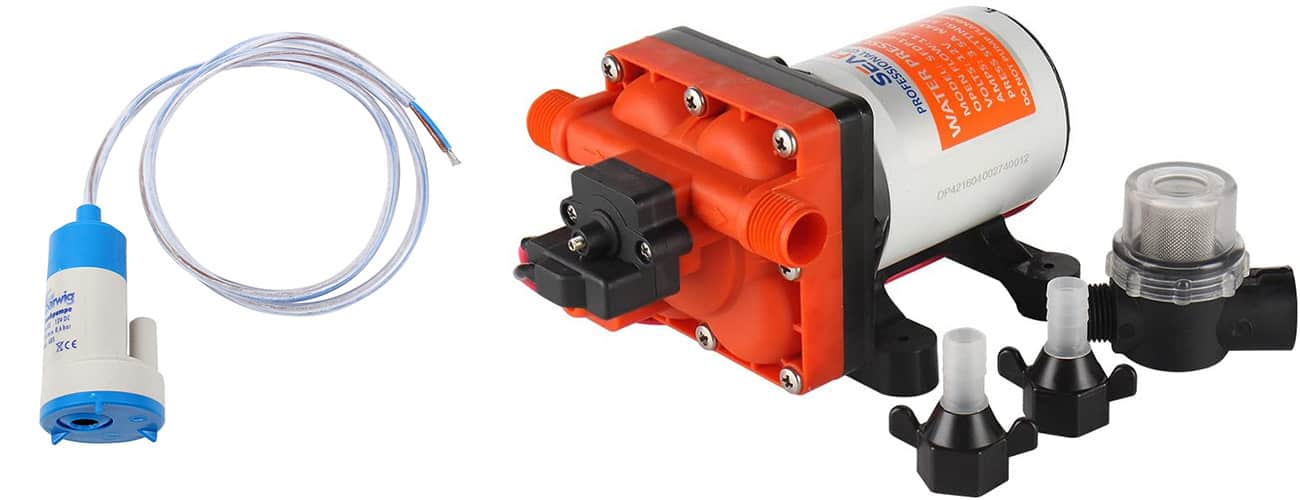
Water Containers and 12V Portable Submersible Water Pump
This works with bigger store bought water jugs but it is better if you get bigger water canisters / containers and then fill them up with water. Then you get a 12V portable submersible water pump, plug it into the automobile auxiliary power outlet (car outlet, cigar lighter socket) and put it inside the canister. Pump comes with a hose and a shower head that you can then use to shower outside, do your dishes (plastic basin method), fill up your water bottle, wash your teeth etc…
Water Containers Under the Sink and 12V Submersible Water Pump
This is the simple version of a regular camper van kitchen, because it doesn’t require any plumbing. Kitchen sink with faucet is installed in the van. n the cabinet under the sink you put two separate water canisters. On holds fresh water and the other one is for waste water. They can be the same size or even more often, the waste water canister is smaller. The fresh water canister has a submersible 12V water pump that is connected to the faucet that turns it on and off. So when you turn on the faucet the pump turns on as well and water from the fresh water canister starts running. Sink drain is then connected to the waste water canister. Both canisters need to be fixed either with straps or simply by the cabinet itself. They must also be easily are removable. Usually there is a simple cap at the top of the canister that stops the water from splashing out of the canister when you are driving. The cap has a hole that fits a hose from the faucet (or drain). To remove the canisters you pull out the hose and take canisters out of the cabinet. That’s it, simple.
Water Tanks, Water Pump and Plumbing
This is how a complete water and plumbing system usually looks and is found in all factory camper vans.
Camper Van Water Tanks
Special water tanks are installed in the van. They can be installed under the van (saves space but higher danger of water freezing in winter) or they can be installed inside the van (uses lots of space, but less chance of freezing in winter). The size of these tanks depends on the available space, but a general rule is that you never have enough fresh water! A serious camper van should have at least 60 liter fresh water tank. Waste water tanks are usually smaller, maybe a half of the fresh water tank. Usually it is easier to drain your waste water that to find fresh water. Also, driving around with extra waste water weight is stupid. Empty the waster water tank whenever possible. These tanks are custom made for camper vans. They are shaped so they fit under or inside of the van. They also come with water height sensors, so you always know how much water you have. Both fresh and waste water tanks have drain pipes under the van so you can empty them.
Plumbing
Since tanks are not installed directly under the sink/bathroom, you will need pipes that connect them to the faucet, shower head etc… The system looks something like this. Fresh water tank is connected to the outside fresh water hookup. This is a hole at the side of the van used to fill up your fresh water tank. Fresh water tank then usually has two more holes. One goes to drain pipe, so you can empty the tank and the other one goes to water pump. Water pump then pushes the water to the faucet in your kitchen sink, to your shower and anywhere else you have water.
Waste water tank is connected to the kitchen sink drain and shower drain. This was dirty water gets into the tank. Again there is also a drain pipe for emptying the waste water tank.
12V Camper Van Water Pumps: Submersible vs Pressurized
You need a water pump to pull the water out of your fresh water tank and push it into your faucet or shower. There are two types of water pumps. A simple submersible water pump is a water pump that is activated when you open the faucet. It runs as long as the faucet is opened and stops when you close it. Pressurized water pump pumps the water beforehand, creating pressure. When you open that faucet water starts running and only when the pressure drops the pump turns on. Here are some pros and cons of each.
Submersible water pump pros
- Easy to install, just drop it into the tank
- Because it’s simple it doesn’t break down often
- Quiet and inexpensive
Submersible water pump cons
- When you open the faucet it takes some time before the water starts flowing
- Not very durable and can not be fixed, needs to be replaced
Pressurized water pump pros
- Because the pressure is already there the water flows immediately when you open the faucet
- Lasts longer and is more durable
Pressurized water pump cons
- A bit louder than the submersible pump
- More expensive
- If there is a leak somewhere in the system the pressurized water pump will pump the water until there is non left (btw, usually there is an extra switch that allows you to turn the pump on/off which also prevents this from happening)
Warm Water
If you want to have warm water inside the wan (remember the heating chapter) then you have to put an extra element into the plumbing system. This is either a separate water heater or a water heater that is part of the van heating system. In both cases the water then flows from the fresh water tank into the water heater. Water heaters can have their own small hot water tank (10-20 liters) so hot water is available even when the heater is switched off. If you want hot water all your plumbing will have to be doubled, one hose for cold and one for hot water.
Having hot water in the van also means a separate water release valve. This valve is temperature sensitive and it drains the water from your system in there is a chance of freezing. This valve is electronically operated, so it opens automatically when the temperature drops OR WHEN IT LOOSES POWER. It does not however automatically close when the temperature goes up or power comes back on. If the water is leaking from your system, check this valve. It is usually located somewhere near the water heater.
Blocked Sink or Shower Drain and Dish Washing Tips for Camper Vans

A few more tips are in order here. Camper van plumbing is more delicate than plumbing in your home. This means it can get clogged more often and it is better not to use those drain cleaning chemicals to get rid of the clog. The can harm your plumbing. For a full guide/story on how I have solved the most stubborn drain clog ever using all the possible methods check the camper van beginner mistakes guide.
It is best to avoid the clog in the first place. Be really careful of what you flush down the drain. Anything more that dirty water can cause problems. Here are a few tips:
- When doing the dishes always use paper napkins to remove all the food leftovers from the dishes and throw them into a trash bin. Before you start doing dishes they should be almost clean:)!
- Get a good drain waste filter for the sink and shower drains.
- Throw things like hair, sand, coffee…into the trash bin.
Getting Fresh Drinkable Water
Depending on your location, getting fresh drinkable water can be a challenge. I did a whole chapter on how to get fresh water in Italy in the Sardinia by camper van guide. Since Italy is one of the worst places to get fresh water, those tips are pretty solid and can be used everywhere.
Camper Van Gas
Types of LPG: Butane and Propane
- Butane is a bit cheaper and gives a bit more energy.
- Propane has a lower boiling point than butane. This means you can use propane in really cold conditions (-45ºC). Butane starts to freeze when temperatures drop around zero C. When it freezes it’s like you have run out, even though the gas bottle is still full and heavy.
- Propane is usually cleaner. This means less chance for soot and no need for cleaning you heater chimney.
Which gas should you use in a camper van, butane or propane?
I would suggest propane and I think also most people use it. In summer it doesn’t really matter. But in winter definitely get pure propane. Here are a couple of points to consider:
- In some parts of the world propane is more popular and easily accessible and in some parts it’s butane.
- Sometimes butane cylinders actually hold a mix of butane and propane. Same goes for LPG that you get in gas stations. In sub zero temperatures you will only be able to use propane, butane will be left frozen in the bottle.
Gas Cylinders/Bottles

Majority of camper vans use 10 kg gas cylinders, only few have special gas tanks that can be filled up at gas stations that offer LPG. What do you need to know about using gas cylinders in your camper van? Apart from safety, here are a few tips:
- More often than not different countries will use different connectors on bottles (whole country then uses the same fitting). This means that usually you can not simply buy a full bottle of gas in another country and plug it into your van. To do this you will need an adapter. It is best to buy an adapter in your home country. This way you will be able to either buy a new gas cylinder or get your empty one filled (shops where empty cylinders can be filled can be harder to find).
- Different gas companies usually use different cylinders. They differ in color and also a bit in shape. It is not possible to exchange an empty gas bottle from one brand for a full one of another brand. You will have to look for a shop that sells your brand. If you can not find it, you can buy a new full bottle of another brand. Sometimes a new full gas bottle can not be bought without ordering it in advance, waiting a few days etc…
- With all this in mind, it is best to leave home with full gas cylinders. If you have enough space in your van, bring two!
How Long Does Propane/Butane Bottle Last in a Camper Van?
How long does one 10kg propane bottle lasts? It depends on what you use the gas for and on the outside temperature and van insulation, if you use it for heating. My van uses propane gas for heating, hot water and cooking. This is almost maximum possible usage (freezer could also run on gas but mine is electrically powered). In winter time with sub zero temperatures in the night (-7C – -12C) a full bottle is used in 2-3 days, but our camper van insulation is minimal (also check camper van winter tips and insulation chapter). In summer, when gas is only needed for cooking and hot water, a full bottle lasts 14 days or more. In Spring and Autumn with some heating (outside temperatures around 6C in the night) a full bottle lasts about a week.
Safety
The main concern with having gas bottles in your van is gas leakage, especially in a case of a car crash. Combine a gas leak with a spark and you can have an explosion. Propane and butane are highly flammable. There are a couple of safety measures that go with installing gas in the camper van:
- The cabinet where you keep the gas cylinders needs to be ventilated to the outside of the van.
- Gas installation (valves, pipes, stove… etc) should be done by a professional.
- There needs to be a safety shut off valve on the gas bottle, this valve closes the gas in a case of a crash and prevents the gas from escaping from the bottle.
- It is better to close the gas cylinders while driving.
- Propane and butane are non-toxic so LPG gas leak is not a problem health wise. Propane and butane are heavier that air so they accumulate near the floor. If you sleep on the floor this could lead so asphyxiation. Gas is also odorless so odor is artificially added so we can smell if there is a leak.
- You can get a 12V camper van gas sensor that detects really low gas concentrations, it can even go off if you fart :). So to be safe, it’s a good idea to get one.
- Overall LPG has an excellent safety record.
Camper Van Cooking
Stove
I would say 99% of camper vans have some kind of gas stove. The remaining 1% go with an induction plate or something even more exotic. These use huge amounts of power so you need a huge power bank (lots of batteries) and lots of solar. Sometimes bigger camper vans, but even more often motor homes, also have microwave ovens and regular (gas powered) ovens. In a regular van I think you can use the space that these take in a more useful way.
There is not that much to say when it comes to gas stoves. You can have smaller portable stoves that you only pull out when you need them or you can have a gas stove that is installed on the top of the kitchen cabinet. If you get a camper van specific stove (and also camper van specific kitchen sink) they will usually both have a cover that can turn them into a counter top, extending your work surface.
You can see the sideways bed and kitchen stove and sink in this video:
Camper Van Dishes, Pots and Pans
My tip here would be, don’t over do it. Start with what you can not live without and then with time maybe add a few more things. Keep it light. More items means bigger mess inside the van. You can go with special camper van plates, pans etc… or just get regular ones. Camper specific ones are lighter, but also way more expensive and imho not worth it.
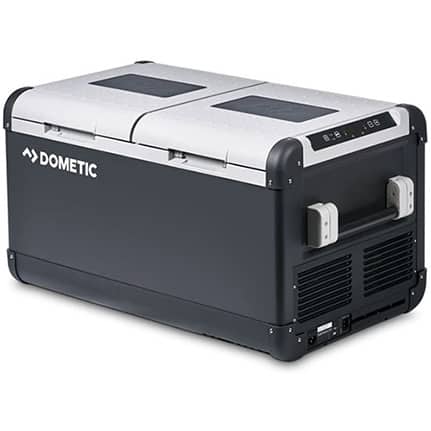
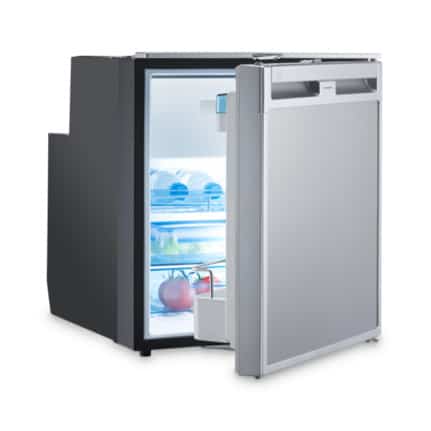
Fridge/Freezer/Refrigerator
There are three types of fridges that people usually use in camper vans: compressor fridges, gas fridges and thermoelectric coolers.
Compressor Fridge
A compressor fridge is powered by a compressor. This is similar to how your standard home refrigerator works. A compressor fridge is I think the best option for anyone that wants to spend more than just a couple of day at a time in a van. It really keeps things cool, it even has a freezer drawer and it is reliable. The downside is that camper van compressor fridges can be quite expensive. A good compressor fridge might be most expensive thing you will buy for your van. Compressor also runs on electric power so refrigerator will probably be the biggest power consumer in your van.
Even though a camper van compressor fridge basically functions the same as a home fridge, it is still better to buy one meant for a camper van. Van fridges run on 12V DC power which is what you usually have in a van. To run a regular fridge, you would need a DC to AC converter, so you can plug it in. But, even regular fridges run on DC, they just have an in built converter. When you plug one at home into an AC socket, it first turns AC to DC. All these DC – AC – DC conversions result in power loss. This is why a 12V DC refrigerator is best.
There are two types of compressor fridges, a portable one and an built in one. What are the pros and cons of each?
- You can take it out of the van when you don’t need it.
- You can take it out of the van and leave it outside by the van if the outside temperature is low. This will lower it’s power usage.
- Portable fridge door are at the top, when you open it the cold air stays inside, because it is heavier.
- Because the doors are at the top finding a place in your van for the fridge is more complicated. It has to be out in the open or you have to invent some kind pull out drawer for it. Either way it ends of taking more space than a same sized build in fridge would.
- They are usually smaller than build in fridges.
- Has more space for your food.
- Installing it in a cabinet puts it out of the way, so it’s more convenient.
- You can not take it out of the van, but if your van is big enough for a built in fridge I can guarantee you will never even think of taking it out.
- When you open it you are loosing cold air.
- It’s a bit harder to clean than a portable one.
Which one do I recommend? I have a built in fridge and it is very convenient. I would not change it for a portable one. But this is I think a personal preference.
Gas Fridge or Absorption Fridge
Camper van gas fridges can actually run either on gas or on electricity. But since they are not compressor fridges the electricity part is not very efficient. Gas fridges are used to lower your power consumption. If you don’t have a big power bank, if you don’t have solar, then a gas fridge is a good idea. All the safety and installation issues that come with gas must be considered here. These fridges are efficient and silent (although I’ve heard some complaints these don’t work that well, especially if they are old).
Thermoelectric Coolers
Thermoelectric coolers are coolers that use electricity to remove hot air from inside the cooler. They can lower the temperature inside the cooler to about 20C lower than the outside temperature. They are cheap compared to compressor and gas fridges so they are great if you are building your van on a budget or if you only rarely need a fridge.
Electricity, Batteries and Your Power Bank
Before I bought the van I was clueless about the car batteries. But as you will see, batteries are the heart of your van. If they are dead, nothing in the van works. No lights, no water, no heating, no hot water, no fridge, no music, no phone charging…nothing.
This is what you need to know about camper van batteries:
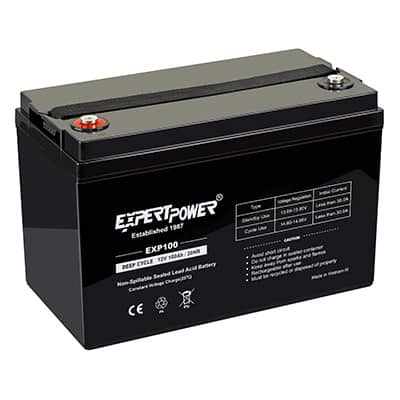
Camper vans usually have at least two batteries. Regular car battery that is used to start the car and a leisure battery in the back that is needed to power all the things in the back of the van. You can have one or more leisure batteries, depending on their capacity and your needs. Leisure batteries are also called your camper van power bank.
Leisure camper van batteries are different from regular car batteries. They are also called deep cycle batteries (a cycle is the act of filling and emptying the battery). Deep cycle means that these batteries can be discharged to a lower level than regular batteries. Regular car battery only needs a huge amount of power in a short amount of time to start up the car and when your car is running, the battery is no longer needed. Deep cycle battery is designed to give power for a much longer period of time. If you would use a regular battery this way, you would ruin it pretty fast. On the other hand a regular deep cycle battery does not give enough sudden discharge to start up a car, but there are some that can be also used for that. Since deep cycle batteries are more expensive than regular ones this is used only as a backup or in boats that use one battery for both purposes.
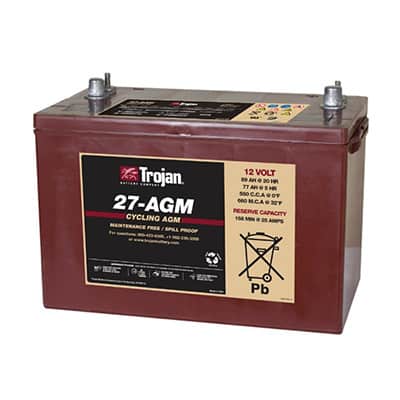
Types of Batteries Used in Camper Vans and 50% Rule
There are 4 types of batteries that you can use as leisure batteries in your camper van. From cheaper to more expensive they are lead acid batteries, AGM batteries, GEL batteries and LiFePo4 batteries. Lead acid, AGM and GEL batteries use similar technology and their biggest downside is that you can not discharge them more than to 50%! Yes, you can only use half of battery power before you have to recharge it. If you go below 50% regularly you will severely shorten your battery lifespan.
I don’t want to go to much into detail how each o these batteries work, because there could be a separate article of same length just about batteries:). But here is what you need to know:
- the cheapest,
- they loose power when not in use (self discharge, this means you have to recharge them every now and then even if they are not used to prevent them from dropping under 50%),
- these batteries used to require maintenance and had to be vented because they produced gas when charging, but new ones are zero maintenance and should be gas free,
- lifespan: 300 to 500 cycles (how many times you can recharge the batteries before they start loosing capacity).
- more expensive,
- they only loose minimal amount of power when not in use (low self-discharge),
- no maintenance,
- can be used in any position (turned sideways or upside down),
- faster charging and discharging times (if needed),
- lifespan: 700 to 800 cycles (how many times you can recharge the batteries before they start loosing capacity).
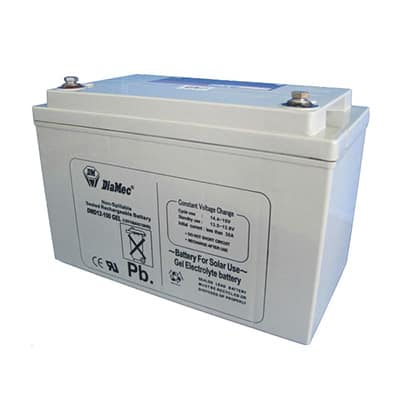
- expensive,
- gel is used instead of liquid so they can be mounted in any position (turned sideways or upside down),
- they only loose minimal amount of power when not in use (low self-discharge),
- lifespan: 1000 cycles (how many times you can recharge the batteries before they start loosing capacity).
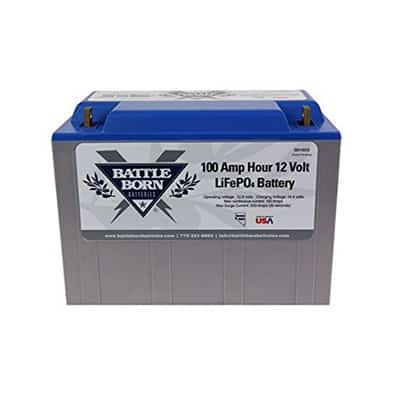
- very expensive,
- can be discharged almost completely down to 5%! This means that you can use 95% of the battery before recharging.
- Much lighter than the other three, a 200Ah AGM battery weights 50kg, you would only need a 100Ah LiFePo4 battery for the same amount of power and it would weight around 13Kg, which is half the weight of a 100Ah lead acid battery.
- lifespan: 3000 cycles (how many times you can recharge the batteries before they start loosing capacity).
How To Charge Your Camper Van Batteries
There are a couple of ways to charge your batteries but first know this – lead acid, AGM, GEL and LiFePo4 batteries they all need a different way of charging (different voltage at different times). This means that if you want to install different batteries in you camper van you will also have to replace the charger that takes care of the charging. Now lets see where the electricity to charge your batteries can come from:
Car Alternator While Driving
Your leisure batteries can be charged when you are driving. This is very convenient, but keep in mind that you have to drive for quite a long time to fully charge the batteries. How long? Depends on many variables but at least 5-7 hours. To charge leisure batteries while driving you first need to have a strong enough alternator. Alternator is the part that creates electricity when the car is turned on. Usually bigger vans have alternators that are strong enough, but it is worth to check. Then you need either an isolator or a battery to battery charger. Which one you need is partly personal preference and partly depends on how big your batteries are and how strong is your alternator. Both of these gadgets also prevent your leisure batteries to drain your car battery when the car is turned off.
Gas Powered Portable Generator
People with motor homes use these all the time. Vans not so much because these take up space. A gas powered portable generator is a electricity producing “engine” that runs on gasoline. You turn it on, plug it into your system and wait until the batteries are charged. They are also very noisy.
Grid
Almost all camper vans and motor homes also have an external electrical hook up. This way you can plug your camper van into any AC outlet and all the electrical equipment in your van will work plus your batteries will be charged. You of course need an AC to DC converter in your van for this to work.
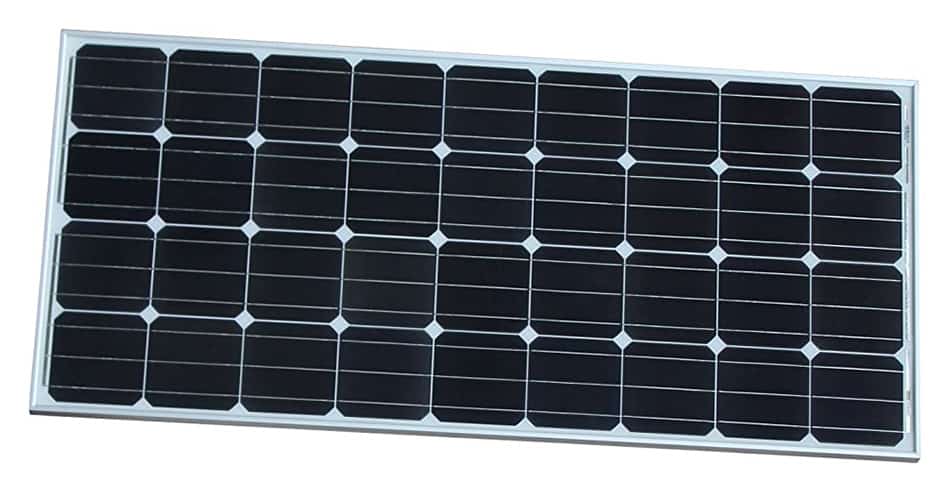
Solar Panels
If you want to be independent and be able to stop anywhere and stay there for a while then your best friend when it comes to electricity are solar panels. They will charge your batteries during the day when it’s sunny (more on them in the next chapter).
Replacing or Upgrading You Camper Van Batteries
One thing I have already mentioned, if you are replacing your camper van batteries get the same type or you will also have to replace the charger. But that is not all. If you have more that one battery, all batteries should be exactly the same capacity and age. So if you already have two batteries, you need to replace them both! You can not wire together batteries that have different capacity and difference in capacity can also come from age. Older battery can have lower capacity even if both, older and newer are lets say 100Ah.
What happens if both batteries are not the same? The weaker battery will constantly drain the better battery which will shorten it’s lifespan. Since deep cycle batteries are not cheap, keep that in mind.
Camper Van Solar Panels
The most popular way of charging your batteries with people that like to be independent and live off the grid deserves its own chapter. Solar is simplea nd at the same time also complicated. There are quite a few facts you should know as a beginner camper van owner. Lets start with the most common question here: “How much solar I you need?”
How Much Solar Do You Need?
For the whole solar panels and power bank system to work as it should, there are quite a few things to consider:
- First you need to know how much power you need every day. Check the next chapter.
- Then you need to decide, in worst case scenario (heavy clouds and rain), how long do you want your batteries to last if there is no sun and no other type of charging.
- When you have first two points covered, you can decide how much solar panels do you need. But even now there is no straight forward answer because there are again some variables that influence how much power solar panels give.
What Influences the Output of a Solar Panel?
The amount of solar panels needed and how much power they will give you depends on a couple of things. Obviously, how much solar panels do you have and how much power they ideally give. I said ideally because real output power depends on a few variables:
- How much sun there is and how long is the day – shorter days, less sun.
- Angle of the sun, further you are from ideal angle, worse the panels work.
- Is part of the solar panels in the shadow? If part of the panel is in the shadow, whole panel output drops (if you have more than one then also wiring style becomes important – parallel vs series)
- When panels get hot they also lose power. This is why rigid solar panels that are lifted from the van roof work better than flexible solar panels that are glued straight to the van roof (although installation in this case is much easier).
- How good your MTTP controller is. A MTTP solar charge controller is a device that turns chaotic energy from the sun into usable energy for your batteries. It also gives you info on the charging power and amount of power in your batteries. A good MTTP controller can make quite a difference.
- Dirt. Yes, wipe the solar panels clean every now and then.
Parallel vs. Series
Here we are talking about how to wire solar panels if you have more than one. You can wire them either in series or in parallel.
- Amps stay the same, voltage is additive (two 12V panels give 24 V etc…)
- Higher voltage means better efficiency and lower loss of energy through wires.
- But when one panel is in the shadow the whole system is affected.
- Volts stay the same, amperage is additive (two 8 apm panels give 16 amp etc…).
- If one panel is in the shadow the other one works normal.
- Higher amps require thicker more expensive wires and result in more power loss.
These solar panel facts written here can help you understand why sometimes batteries are not charging as much as you think they should. I you are building the van yourself, then you should find a more in depth solar panel installation guide. Here are a few awesome guides to help you out:
How Much Batteries Do You Need?
The theory here is pretty simple. Just write down all the things that use power inside your van and how much power they use per hour. Then calculate how many hours per day you use each of these items and add it up. You have your daily power usage. Then think about your travel habits. For how long do you want to stay independent without using solar panels, without driving around to charge your batteries or without plugging into the grid. Is it tow days, three days? Multiply the number of days with daily usage and you know how much power do you need. The last thing to consider here is which batteries you will use – with lead acid, AGM and GEL batteries you will only be able to use 50% of their power, so you have to take this into the account.
This is theory. In real life the problem is getting power usage for all the items in your van. Some have their power consumption neatly written on a tag somewhere on the item. But for others you will have to use google a lot and in the end also guesstimate. What are the devices inside the camper van that use electrical power? And what kind of power do they need?
Here is a list to help you out:
- 12V lights, led lights, led strips
- 12v fans (your heating and roof vents),
- water pump,
- heater ignition,
- 12V compressor fridge,
- 12V hair drier,
- 12V hair flat iron,
- control panels,
- car radio and speakers,
- anything that you charge directly over USB:
- smartphones
- GoPro
- tablets
- cameras
- rechargeable batteries
- coffee maker,
- blender,
- induction cooktop…
- laptop,
- drone battery and controller,
- DSLR batteries… anything that has a charger that plugs into AC socket.
*check the last chapter
The reason devices are put into three categories is that you can directly read the power usage from 12V items, for the DC items with AC chargers you can usually find the power usage on the charger, but for the AC power items you will have to calculate their usage to 12V current.
If you feel that your van is lacking in battery power, want to upgrade and really do a full inspection of your power needs then I suggest you check out this power audit guide on Explorist.
Camper Van Wires, Wiring and Fuses
Wires and Wiring
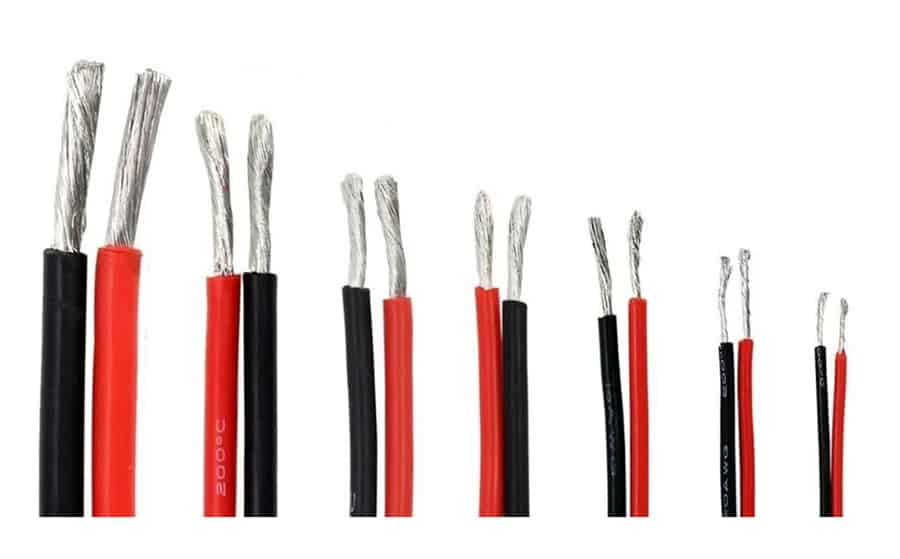
If you are used to thin high voltage wires you have at home you will be surprised. Since all the wiring in the camper van is done for 12V, this low voltage means amps must be higher. Higher amps require thicker wires. The thickness depends on the amperage and the distance (the length of the wire). Thinner wires give more resistance and resistance grows with length. Resistance means that power is lost when current goes through the wire. Thicker wires have less resistance so less power is lost. For instance, wires connecting two leisure batteries are super thick, like 1cm or more! Wires for your LED lights are a lot thinner but still.
Wire thickness is given in either AWG numbers (American wire gauge, used in USA) or in square millimeters (mm2, used in Europe). Wires used in a camper van are usually somewhere between 2 AWG which is 35mm3 used for linking batteries in your camper van power bank and 16 AWG which is 1.5mm2 used for wiring lights etc… Thicker wires can get really expensive, this is why you don’t just use really thick wires for everything.
Again, electricity and wiring explained here is given in layman’s terms. If will help you understand what is going on in your van. But if you will be doing the wiring yourself, look for a more in depth guide. Here are a few awesome ones that you should check:
Fuses
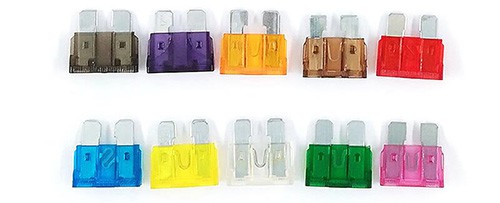
All wires or to be more precise, all power users in the van need to have a fuse. The role of the fuse is to be the weak link in the wiring. In case something goes wrong, the fuse will be the first thing to blow braking the power circuit and your wiring will be saved. Without fuses, wires laid down under your floor, behind the walls etc…would blow instead. And good luck taking apart your van looking for the burned out wire. This is why fuses are super important! It is better to have two than none.
Fuses are labeled how much amps they can take. Fuses must be much weaker than the wiring, so if the fuse blows and you don’t have exactly the same one, you can put in the next stronger one. But don’t over do it. If one fuse is constantly blowing (but it did not before) there is something wrong. Using an extra strong fuse is not the solution!
Where is the Fuse Box?!
If your camper van build is done right then most of the fuses will be placed in a fuse box. Fuse box is a box where all the wires go through and all the fuses are located. This require extra wiring but it is so much more practical when one of the fuses blow. You know where to look to replace it. Do you? Make sure you know where the fuse box is. This is the first thing to check if something in the camper van is not working. Camper van fuse box is not the same as the car fuse box, you van has another fuse box that belongs to the car part of the van. So you will not find the location of the leisure fuse box in your vans instructions (unless you bought a factory build camper van).
Camper Van Lighting
One thing to say here. Use LED lights. They use way less power than regular lights. They are also I think the easiest thing to install if you want to make some changes and upgrades to the van.
Van Insulation and Moisture
Wall Floor and Roof Insulation
An empty metal car body is an excellent heat conductor. This is why a car gets super hot in the summer and freezing cold in the winter. To live inside a van you will need some insulation. Although some people choose not to put in any (usually when making really simple camper van home builds), insulating your van at least a little is a really good idea, even if you will use the van only in summer. The amount of insulation needed depends on the intended use of the van – will you use it in winter, snow and freezing temperatures? If the answer is yes, then you will need to put in some serious insulation. The downside of winter insulation is that it takes up space inside the van. All types of insulation, even ones with best insulation properties, work on more thickness more insulation principle. You will also have to put in new walls to hold the insulation and to hold your cabinets. Since van body has all sorts of shapes, bends and corners insulating everything is much harder than insulating a square house. This is why more insulation is not necessary better, but some is definitely better than none. With some insulation you can still use the van in the winter, but you will use huge amounts of power for heating. So a quick weekend in the mountains can still be done.
Apart from heat, insulation also helps with noise reduction. There is not much more to say here, because if you are not building the van yourself you won’t be making any changes here. But if you are building the van yourself, I can suggest these awesome additional resources for insulating your van:
- Far Out Ride guide to van insulation
- Parked in Paradise insulation guide
- Gnomadhome and DIY van insulation
Window Insulation
Even if your van is really well insulated, a huge amount of heat will escape through windows. Try sitting near the window in a warm car when its cold outside. You can feel the cold radiating in through the window. Now it is hard to put the same amount of insulation over windows than over the rest of the van because this insulation must obviously be temporary and removable. The easiest way to reduce heat loss is using simple windshield sun shades, you know, the silver aluminum lined ones. They don’t actually insulate the windows, but they stop the heat from escaping and radiate it back into the van.
Simple Sun Shades
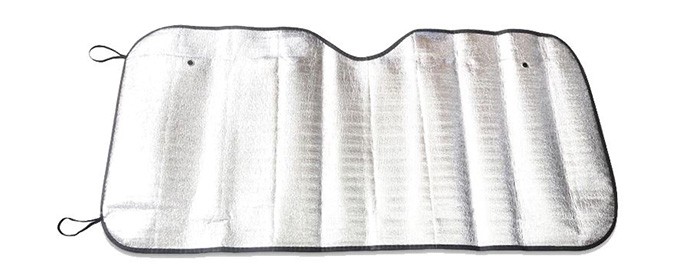
If you get a regular sun shade then these are really cheap, you get a few and cut them up in shape of your windows. Then either use suction cups or sew little magnets in the edges of the material so the insulation stays in place. Some of these shades have different finish on either side. The silver aluminium side reflects heat and the other side either does nothing or absorbs it. If you want to keep the inside of the van warm you put the mats up silver side in. If you want to keep the inside of the van cool flip the maps round so the silver side faces out.
Improved Window Mats
An improved but more expensive version uses better material. A special window insulating material that has more layers. Some of these layers also help insulate the windows, not just reflect the heat back in. Everything else is the same. You can buy ready made (might be hard to find ones ready made for you windows) or you can get a kit an make them yourself.
External Van Cover
The most effective but also most expensive and space consuming solution is a special external cover for the front part of your van. Usually the cabin part of your van is not insulated, even if the back of the van is. Not just the windows, the whole front part. To solve this you can either use internal thermal curtains that close off the cabin from the rest of the van, but you will cut off a big part of your van by using then. So an alternative is an outside cover for the cabin. Another benefit of the outside cover is that the inside of the windows stays warm. Condensation won’t accumulate and freeze on the inside of the windows. But, an external insulating cover is huge and takes up space when folded and store inside your van so it is more common in bigger motor homes.
No matter which of the three solutions you use, even the cheapest one makes a HUGE difference! So if you are parked and it’s cold outside put something on your window!
Privacy
Window mats will also give you privacy, people will not be able to see what is going on inside your van. They will also stop light if you parkp and sleep under street lights or something. Camper van curtains achieve the same thing, but since they offer insulation I suggest you just use the window mats.
Moisture, Humidity and Mold
Condensation accumulates where warm and cold air meet, especially if warm air is high in humidity. Ever notice how in the morning the inside of you car or camper van windows are full of condensation if you have slept inside? Why this can be a problem?
Not just the windows, the whole camper van body made out of metal is a barrier between warm air inside and cold air outside. So condensation can form not just on the windows but also elsewhere. Under your wall carpet, behind your cabinets etc… Constant condensation and humidity can lead to mold. In a small place like a van mold can be hazardous to your health. This can be prevented by insulating the van and making sure that there are no thermal bridges where humid air can come into contact with van body in places where mold can develop. And secondly, try to keep the humidity inside the van low. Just by breathing a person can exhale up to 0.5 liter of water during the night. Then there is cooking, wet clothes, wetsuits, showering etc… Make sure you vent the van even in cold weather.
Camper Van Summer and Winter Tips
Summer
Summer is THE time for camper van. Sun is shining, solar panels are working on all cylinders, you spend lots of time outside etc… The only problem is if the nights are to hot to sleep. Unfortunately air condition uses so much power that no power bank can support it. You could run an air conditioning unit if you are plugged into the grid, but otherwise not a chance. So how to keep cool during the night?
- Have sun shades on windows at all times. The inside of the van will be considerably cooler if sun doesn’t shine directly into the van.
- Get roof vents with fans. One fan is ok, but ideally you would have two vents. One with fan pulling air from the outside in and the other pushing it out. This way the air in the van starts moving, colder outside air comes inside the van, hot air goes out and the breeze also cools down the surface of you skin.
- A cheaper option, or if you can not get the air moving you can also get a 12V fan for the inside of your van. Clip it somewhere near the bed so a gentle breeze flows over the bed during the night. Get one with bigger blades and one that is not too noisy.
Winter
Winter is way more complicated than summer. There are all sorts of problems that occur in cold weather. These are the things that you have to keep in mind in winter:
- Number one issue is water. If water freezes anywhere in your system you will have a problem. Fresh water tank, waste water tank (especially if they are installed outside), plumbing, water heater tank…they are all in danger of freezing. Some bigger motor homes use heated water tanks to solve this. For camper vans, the best thing to do is to only fill water when you are going somewhere, then keep the van at least a little bit heated even when you are not inside. Once you get back home, drain ALL the water out of the van. Turn on the water pump, open all faucets and shower head inside the van and open all water release valves on water tanks. Absolutely no water should stay inside.
- Water heater will have a special water release valve that drains the water when the temperature drops to prevent it from freezing. Sometimes the valve will release the water as soon as it enters the system. This makes filling up the van difficult. Sometimes you will have to manually prevent the valve from opening until the van is heated up.
- To keep warm put insulation mats on all the windows.
- If you have LPG heating carry an extra gas bottle in case you run out. Gas usage is very high in winter!
- Solar panels have only a limited time to fill the batteries because days are short. Lights stay on longer, heating fans work more etc… you use more power and solar panels produce less of it. Take that into account.
A Mix Of Useful Camper Van Tips
Things that did not fit in the above chapters and things that I remembered later (this is constantly updating):
- You will need a water hose to fill up your camper van water tanks. I highly suggest an extendable water hose that doesn’t take much space, but can be very long when needed. Get a storage bag for the hose.
- Get a few adapters for the water hose so you can fit it on to all sorts of pipes. Always carry some duct tape to patch things up if your hose and pipe are still not compatible.
- To plug your van into the AC grid you will need a cable.
- Get a big front door mat and cut it into useful pieces that you can place on your stairs, in front of the shower etc…
Before You Start Driving
These things need to get into your blood. It’s really annoying until they do:
- close and lock all the cabinets and drawers,
- remove all the window blinds,
- empty the table, the counter top… everything little thing must be in it’s place or it will fly all over the van,
- it’s a good idea to get some canvas boxes so you can throw all the small items lying around into these boxes,
- close the LPG valves if you use propane or butane gas.
Must Have Tools and Gadgets for Easier Van Life
USB Chargers
Get USB 12 V chargers for all your electrical devices that run on 12V. What do I mean? Lets say you have a DSLR camera. To charge the battery you have a charger that plugs into AC power socket. The charger then converts the power from AC to DC so it charges the battery. In a van, to use a charger like that, you will need a DC to AC converter so you can plug in the charger which will then again convert the power from AC back to DC. All this results in unnecessary power loss. You can get 12V chargers for most of today’s modern electronic items. You can get a 12V charger for your laptop, drone, DSLR etc…
DC to AC Inverter
If you however want to use devices that run on AC power, you will need to use a DC to AC inverter. Things that need AC power: blender, coffee maker, air dryer… Some of these also come in camper van friendly 12V version, but sometimes they don’t work as efficiency.
Weather Station
It’s useful to know inside and outside temperature and humidity. Get a weather station with an wireless outside unit that you can attach to the bottom of your car.
Tool Box
Get yourself a good toolbox, you will need it.
Damn, it took me way longer to write this guide than I thought it would in the beginning. There are just so many things to a camper van. I hope you found it useful, if you did I would really appreciate if you share it with other people. There are also some links to amazon for items that I recommend and I will get a small % if you decide to buy them. Thanks!