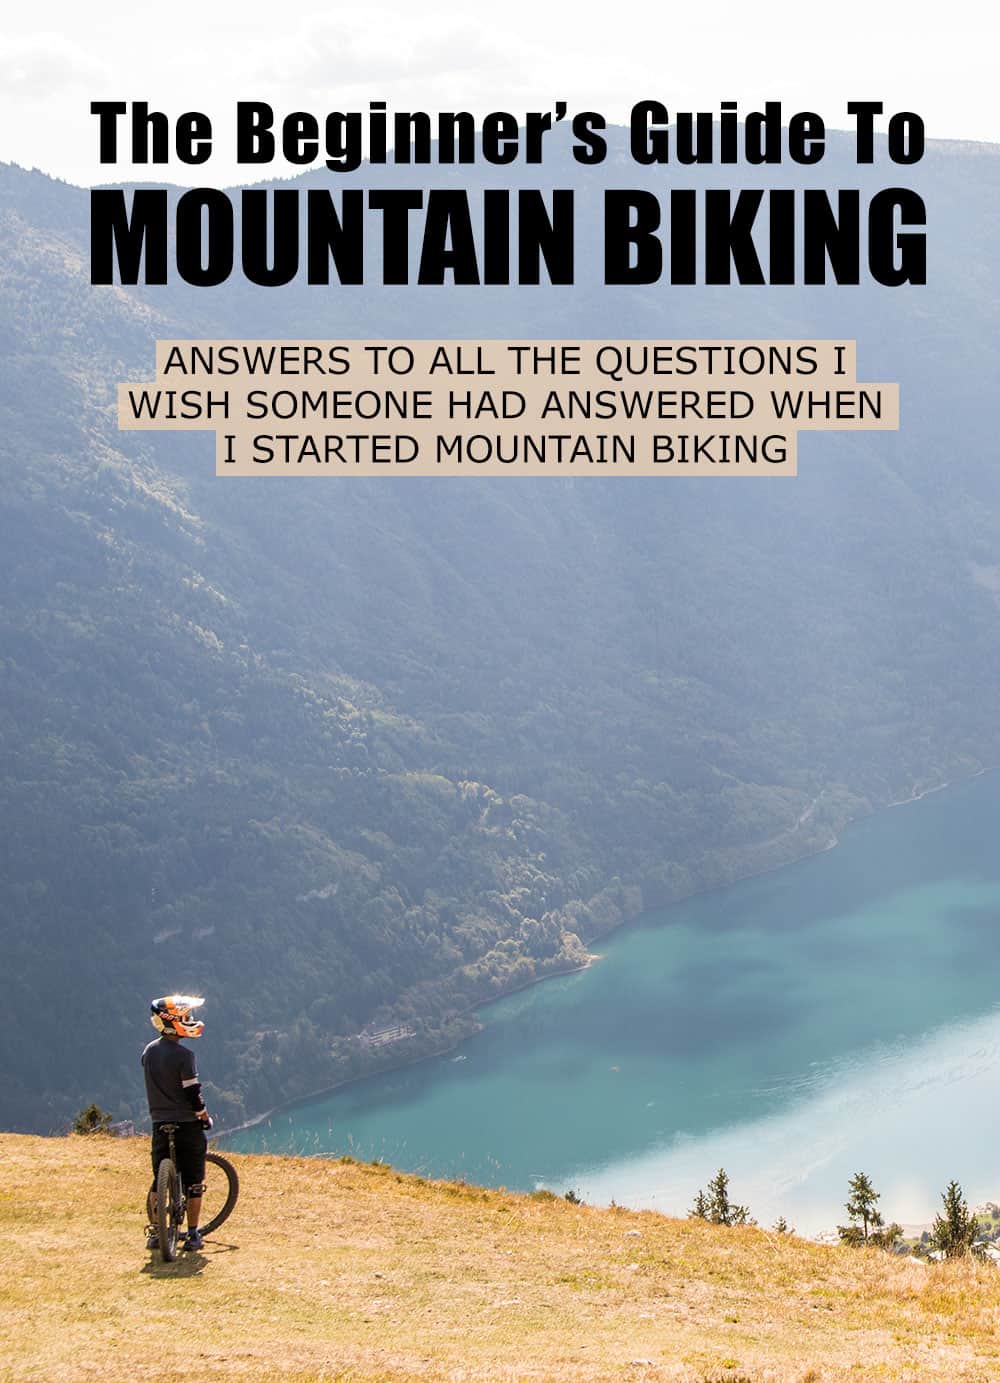
Summer is just around the corner and if you are a beginner thinking of getting into mountain biking this is the perfect time. Mountain biking is a great way to get outdoors in the summer. You will be able to ride trails, get much further out than with hiking, explore nature and there is something exhilarating in the feeling of speeding through the woods that you don’t get anywhere else. Riding is also great exercise and a way to blow off steam after a long day at work. Once you have your bike you don’t need much else. You can just grab your bike and go riding.
This mountain biking for beginners guide will help you figure out what style of mountain biking suits you and what you should look for in your (first) mountain bike. It will equip you with all the necessary knowledge to start mountain biking and answer all the questions I wish someone had answered when I started mountain biking. All that without being too technical:).
Table of Contents
Which Mountain Biking Style Is Right for Me?
Mountain biking is a very broad term that covers many different styles of bike riding. Every riding style has its own style of bikes. With so many different types of mountain biking and styles of bikes, how do you decide what type of mountain biking you’re going to be doing? A general division of mountain biking styles and a quick way to find out which style suits you best can be done by asking whether you prefer going uphill or downhill. Which describes you best?
- Are you the type of person who enjoys pushing their physical limits and challenging them self going uphill?
- Do you prefer the adrenaline rush of hurling down a steep, technical downhill, riding over rocks, roots, making drops and jumps?
- Or are you someone who falls in the middle and enjoys the uphill ride, but looks forward to the fun flow of the downhill? Do you want to be able to pedal to the top of the hill by yourself and then hit that sweet trail that you like to ride?
The type of bike you buy will be geared toward what type of riding you want to be doing. Generally, similar to mountain biking styles, you can lump mountain bikes themselves into those that are good at climbing, those that are good at descending and those that are good at both. Each of these bike styles is quite different from the others. It is almost impossible to use a downhill bike for pedaling uphill and vice versa. Of course it can be done, but only with insane amount of fitness (for going uphill on a downhill bike) or insane amount of riding skill (for riding demanding downhill trails on a bike that is meant for uphill). What I am trying to say is that the difference in bikes really is huge. So you have to choose the bike that fits your riding style.
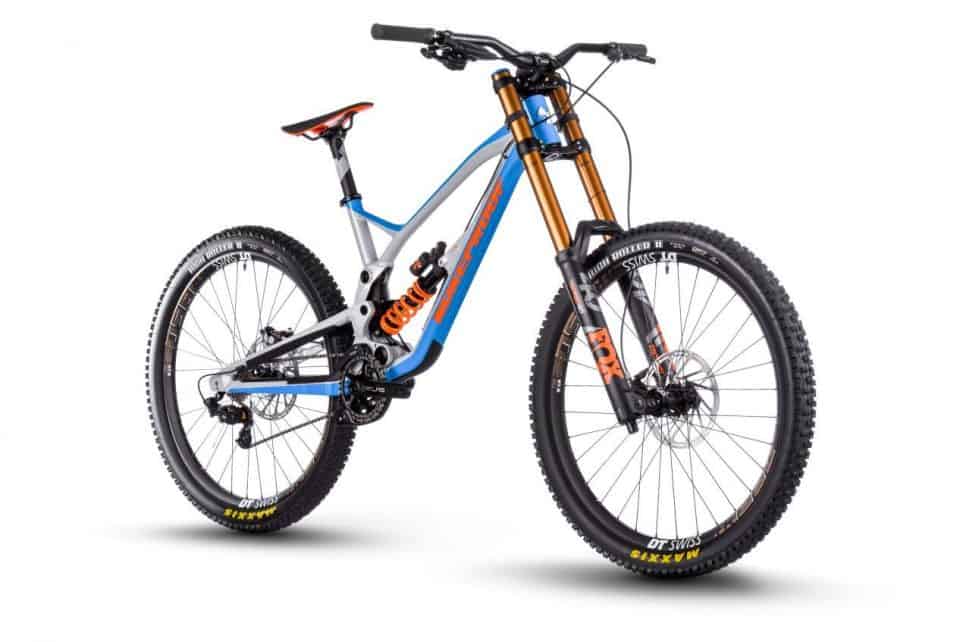
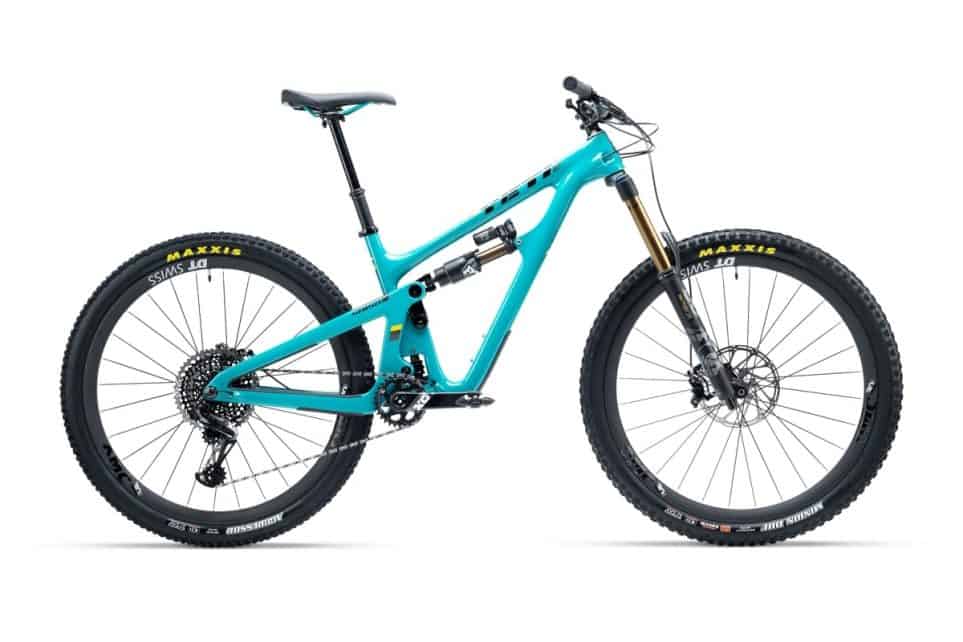
Examples of “Uphill”, “Downhill” and “Do It All” Bikes
Here is an example bike from each of the above mentioned categories. Notice how different the bikes look: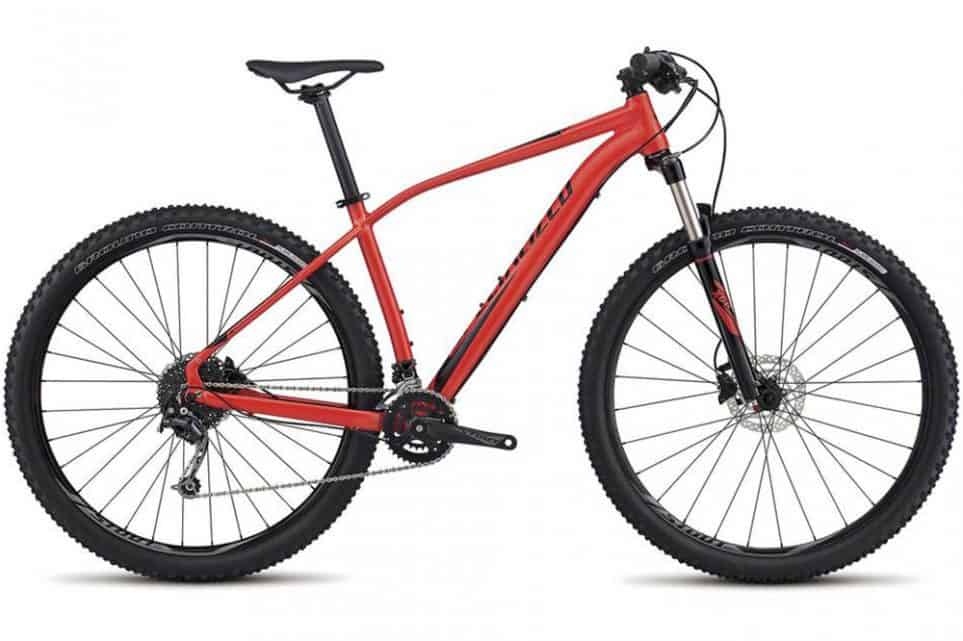
A typical hardtail cross country bike built to be good at climbing.

All styles have their benefits and offer their own adrenaline rush. Bikes that are good at going uphill as well as downhill can do that with a certain amount of compromise. This means that a bike like that will handle worse than a downhill bike when going downhill. It will also handle worse than an uphill bike when going uphill. That being said, these kinds of bikes, bikes that bring best of both worlds can cover most people’s needs and their shortcomings only become evident in more extreme conditions.
Now you may be wondering why a downhill bike is not good for going uphill and vice versa?
The Difference Between Downhill and Uphill Mountain Bikes
There are three main differences that when combined make it “impossible” to pedal a downhill bike uphill and to tear apart a technical downhill trail on an uphill bike. These principles apply to any mountain bike out there. All mountain bikes on the market are a compromise in each of these properties. How the compromise makes them either better for uphill or better for descent.
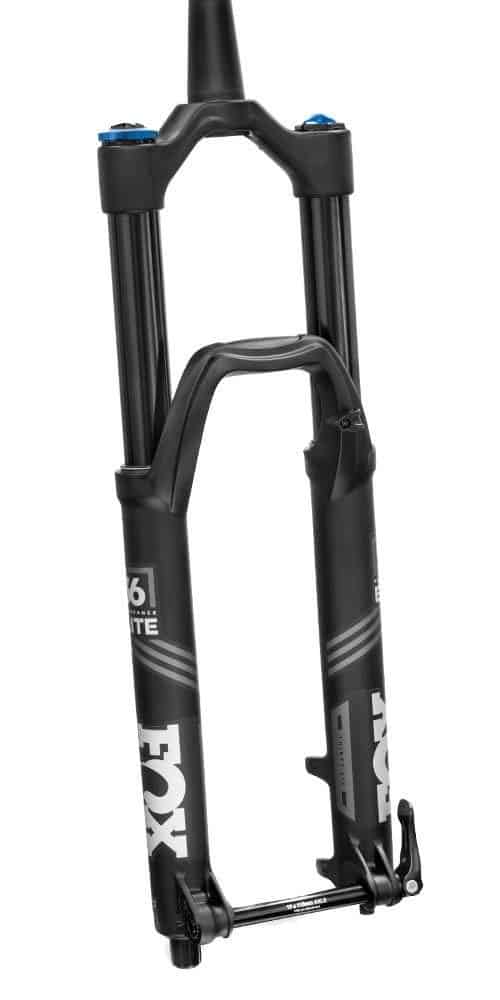
Suspension and Travel
Suspension on the bike absorbs shocks when riding over rough terrain. The amount of suspension is measured in travel (usually in millimeters). It tells you how much the suspension is able to compress before it bottoms out. The more travel you bike has the smoother your ride will be on rough terrain. For instance a bike with 150mm travel should ideally be able to smoothly ride over a 15cm high obstacle. Things are of course not that simple but this is just to illustrate what travel means. The amount of travel the bike has goes hand in hand with the type of bike you are choosing. So a climbing bike will never have as much travel as a downhill bike. It is impossible to get an uphill bike with let’s say 170mm of travel, so keep that in mind.
So why don’t all bikes just have as much travel as possible? Make downhill rides with any bike smoother? When going downhill you would obviously want as much travel as possible. But when you start pedaling uphill suspension becomes a problem. When you pedal you want to transfer all your pedal power to wheels so you propel yourself forwards. You don’t want the power to be lost to bending of the bike, bouncing of the suspension etc… This is why all the best road bikes are made out of carbon. It is the stiffest material out there and it allows most of the pedal power to be transferred into moving forward. Suspension however absorbs a big amount of that power. The more suspension you have the more power is lost and harder it is to pedal. Some types of suspension can be “locked”. This stops them from bouncing and taking away power when you pedal. Downhill bike oriented shocks and forks usually can not be locked.
Note: front suspension is in the bike fork. This is why it is usually called a fork. Rear suspension is called a shock.

Bike Angles and Geometry
When we come to bike geometry things get a bit complicated. It is hard to imagine looking at the bike frame dimensions and angles how the bike will ride (although experienced mountain bikers can do that). The main principle of angles is however quite simple. An uphill bike is angled in such a way that you sit on the bike more correctly when you pedal uphill and a downhill bike is angled in such a way that your position on the bike is better when you are going downhill. Riding a downhill bike uphill makes you want to tip over your rear wheel on fall on your back and riding your uphill bike downhill makes you want to tip over the handlebars and fall on your nose. This is of course an exaggeration, you will not really fall on your back/nose, I just want to illustrate how the angles work.
Bike Build and Weight
Bikes built for pedaling uphill are all about weight, you want the lightest bike possible. But when it comes to downhill you want a bike that can also handle rough terrain, can take a few hits and won’t fall apart after riding over a few rocky trails. This means that in the downhill oriented bike the components are more heavy duty, they are built to withstand more and are therefore heavier. Take a look at the xc and the dh bikes in the photos above. Notice the difference?
This is why pedaling uphill on a heavy bike, while sitting in a “wrong” position and suspension dampening your pedal power is really hard. And this is why descending fast on rough technical steep terrain on a light bike, while sitting in a “wrong” position and without much suspension is also really hard. This is also why, again, you should choose a bike that goes with your riding style.
Now let’s go into different mountain biking styles.
Styles of Mountain Biking
Trail Riding and Trail Mountain Bikes
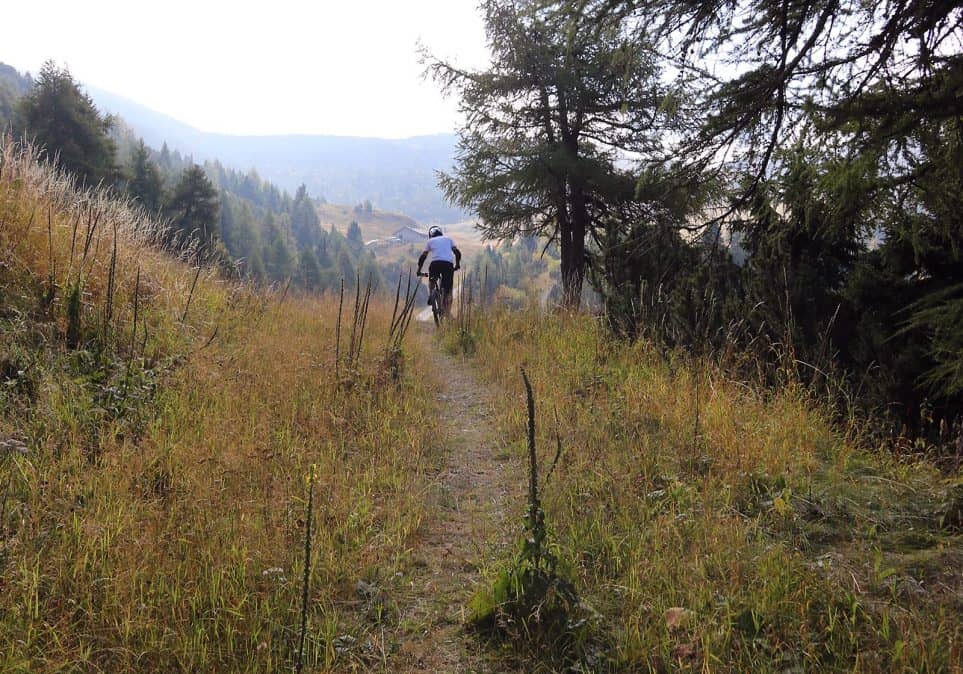
Trail riding is the most popular type of mountain biking. Most people refer to trail riding as simply mountain biking. This style of biking poses a balance between climbing and descending which is why it is the most popular among the average mountain biker. Those who choose trail mountain biking enjoy both the climb and the descent and are typically going to ride for fun. These bikes are not designed for a specific type of racing, and are generally good on all trails.
Trail riding is all about the fun and work of the climb to enjoy the downhill and see where your bike can take you. This style of biking is looking for adventure and getting out on the trail, not being concerned about run times or tricks. Trail riders may time themselves on familiar trails as a way to mark their progression over the course of a summer or several seasons (you should check Strava app for that and you should check Trailforks to find trails trails to ride in your area).
Trails we ride can be very different; they can range from two track dirt roads to steep, technical single track. Most trail systems have signs and maps posted at intersections so riders know where they’re at, the trails level of difficulty and what obstacles they may encounter on the trail. When talking and reading about trails you will find the following terms:
- SINGLETRACK: singletrack is a name for trails that are only wide enough for one bike, these are usually the trails that are the most fun to ride.
- FLOW TRAIL: flow trail is a trail that is mostly smooth without much roots, rocks and obstacles; it is not very steep and “flows” nicely so it can be ridden at speed. This is a perfect trails for mountain biking for beginners.
- TECHNICAL TRAIL: if a trail is technical it means that it has lots of roots and rocks to ride over, some of them also cannot be simply ridden over but you have to pick the right line over the obstacles, usually technical trail is also steeper and because of all the obstacles cannot be ridden fast. Trails like these are meant for intermediates and experts.
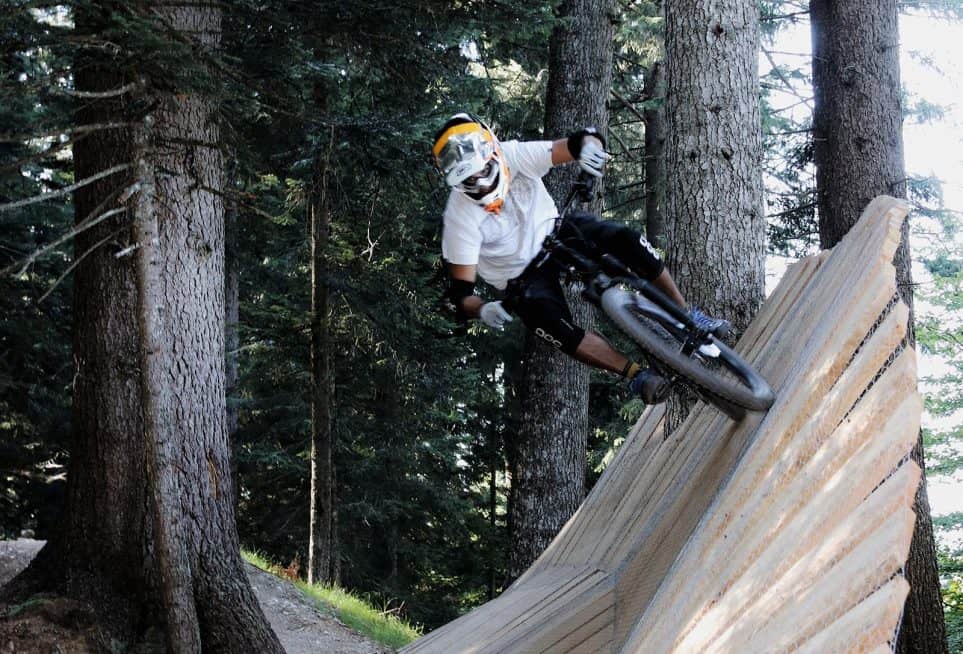
Lots of natural trails are a mix of both, they have some flow parts and some technical parts. Trails that are man built, especially in bike parks are more defined and are either flow or technical. In bike parks you will also find trails called “North shore” with wooden objects to ride, jump trails with lots of tables and other jumps, DH trails that are rougher and meant to be ridden on downhill bikes etc…
Since trails can be so different trail riding itself is a very broad term and a whole array of different bikes falls into this category.
Bikes here again differ depending on how much they are climbing oriented and how good they handle on the descent. Bikes used for trail riding can either be hardtails or dual suspension. How much money you want to spend, and how aggressively you intend to ride should help shape your decision between hardtail and dual suspension.
Hardtail Bike
A hardtail bike only has suspension in the front fork. Riding without suspension brings two difficulties. First, the ride is much bumpier and second, every time the back wheel hits and obstacle it bounces of it and temporarily looses contact with the ground. Suspension on the other hand makes the ride smoother and if it is set up properly keeps your back wheel in contact with the ground most of the time. Why is contact so important? Ground contact means control! So why would you get a hardtail then? There are a couple of reasons. You can get a nicer hardtail bike with quality components for the same amount you can buy a dual suspension bike that may be heavier and have lower quality parts. A hardtail trail bike will have 100-120 mm of travel in the front fork. A bike like that is more climb oriented and should be bough if you:
- like going uphill
- mostly ride smooth flow trails where rear suspension is not needed or
- want a more challenging ride
- want to save money
A hardtail bike is also much better for pumping either on trail or on pumptracks.
Dual Suspension Bike
A dual suspension trail bike will have front fork suspension as well as a rear shock. Here you will find between 120-175 mm of travel. Usually the amount of travel in front and in the rear is the same but often the rear shock has a bit less travel than the fork although difference is never big. Also, you will notice that the amount of travel in the fork is the same as the length of the slider part of the fork. When it comes to rear shock you will see that the shock itself is shorter than the stated amount of travel. Why? Because the amount of travel describes how much travel the rear wheel can do, not the shock itself. Rear shock is just one part of the rear suspension system (rear triangle). If a bike has 150mm of back travel this means that the rear tire can move up/down for 15cm.
A dual suspension bike is more descent oriented and should be bough if you:
- like going downhill
- want to also ride rougher trails
Even with dual suspension bikes we could make a distinction between bikes depending on the amount of travel they have.
Dual Suspension Bike With 120-140mm of Travel (Also Called All-Mountain Bikes)
These will usually have suspension that can be locked when going uphill. They will be lighter, can handle uphill better and are still great at going downhill.
Dual Suspension Bike With 150-175mm of Travel (Also Called Enduro* Bikes)
These may or may not have suspension that can be locked when going uphill. They will be sturdier, heavier, more difficult to pedal uphill but better at handling rough and demanding terrain when going downhill. They can also be used in bike parks. I would recommend this bike if going up for you is just a way to reach the top of the trails without using a car shuttle or lifts and the main goal of riding is going downhill. Usually these bikes are not considered trail bikes, but for the sake of this guide I have put them here.
Trail bikes are also the most forgiving and “easy” bikes to start on. They work on most of the terrain and suspension makes them easier to ride over obstacles. They are great bikes for mountain biking for beginners.
*check what is enduro in one of the sections below
Cross Country Mountain Biking and X-Country Bikes
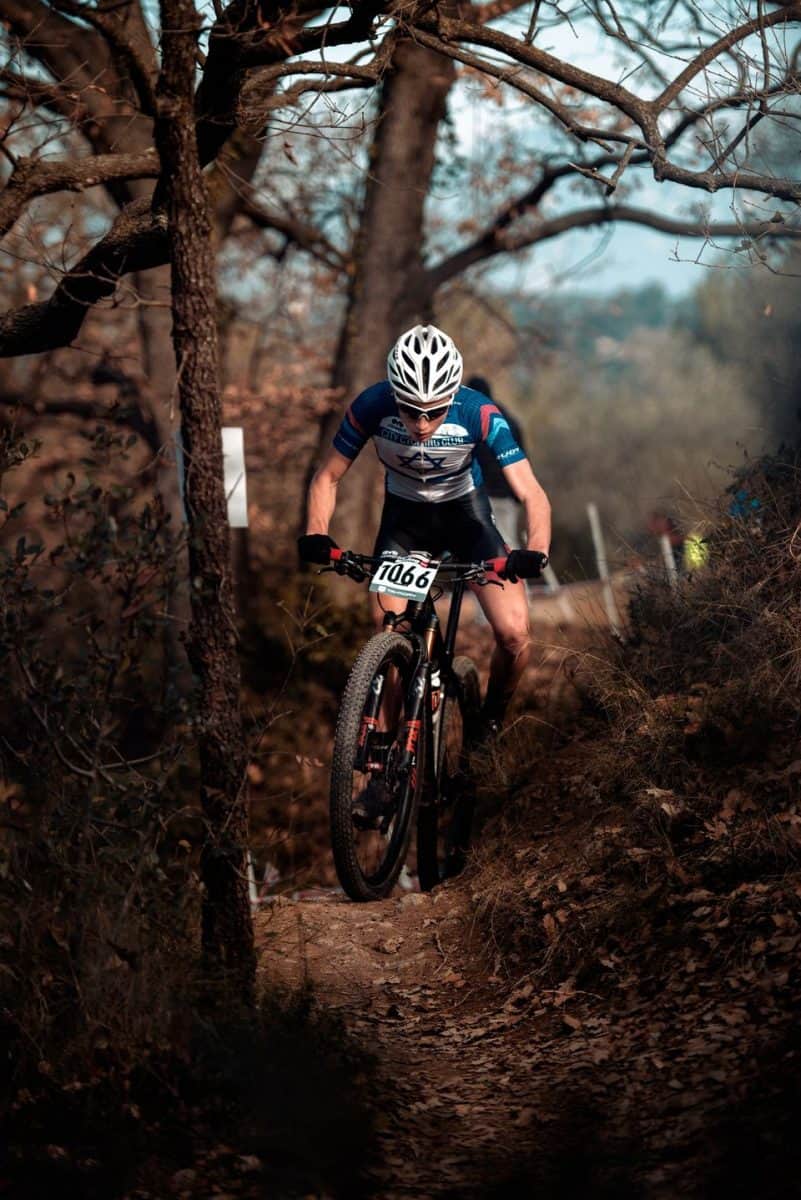
Cross country mountain biking is similar to trail riding, but with more emphasis on speed specifically on the climb. Rides can be as casual as getting out on the trail with friends, or competitive world cup racing. Trails range from two track dirt roads to technical single track. Usually the trails are a mix of going up and down throughout the whole length of the trail. Cross country riders push hard to reach the top of the climb and are not looking for a challenging downhill ride. This sector of mountain biking is for those who enjoy pushing their body to new physical limits to go faster and farther. Cross-country riders are similar to road bikers in that they wear spandex and light weight bikes are a must.
Typically, cross country bikes are hardtails, meaning the bike only has suspension in the front fork and the rear of the bike is rigid. This allows riders to push hard on the cranks to turn the back wheel and power uphill. Some cross-country riders prefer dual suspension bikes since having the rear travel makes technical descents easier. These dual suspension bikes have less travel than a trail or downhill bike. The air shock suspension can be locked out while climbing for the rider to transfer more power to the cranks. Cross-country bikes typically have between 80-120 mm of travel in the front fork for hard tails and about the same amount of suspension in the rear for dual suspension.
Having a lightweight bike is important for cross country mountain biking since the sport is mainly about speed on the climb. High-end cross-country bikes will be made of carbon and feature lightweight, expensive parts. The lighter your bike, the more expensive it will be up front and to maintain. These bikes are designed to excel going uphill, but don’t provide the smoothest or fastest ride down.
Majority of cross-country riders prefer 29-inch wheels, or 29ers. Having larger wheels means a faster bike and greater momentum which is your friend especially on climbs. One downside to 29-inch wheels is they can be more difficult to maneuver on technical terrain especially descending. However, this is not a cross country mountain bikers main concern.
Cross country mountain biking is the most popular form of mountain bike racing. All riders are on the course at the same time so they know where they stand in the race. This became an Olympic sport in 1996 and is the only form of mountain biking in the Olympics.
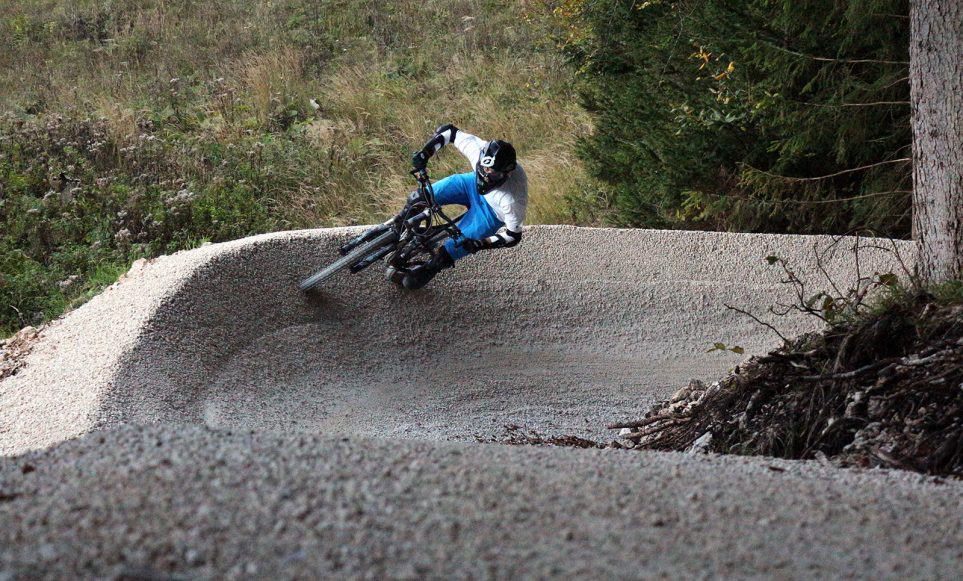
Enduro Mountain Biking
Enduro mountain biking is a sport for those who like to be competitive with their friends, especially when it comes to downhill sections of trail. An enduro race is a series of downhill time trials between which riders either pedal up, or take a ski lift or shuttle. This style of racing is for those who mostly care about the downhill, but still enjoy the rewarding experience of the climb. There’s less spandex and extreme fitness required than cross-country racing, less fearlessness than downhill racing. Enduro is considered the every-man’s sport when it comes to competitive mountain biking.
Downhill time trial rules and typically the same from one enduro race to the next, but rules for uphill portions can differ from once race to the next. Although none of the uphill sections are timed, riders do have to complete the course in a set amount of time. In some races there are time cut offs in which you need to make it to the top of the next downhill section if you are to continue racing. Other enduro races require riders to complete the entire course in under a certain time for their score to be counted.
Enduro races are much less intense than cross-country races. Only one rider goes at a time in a time trial style of racing. All racers pedal uphill together, but their times do not matter so there is no jockeying for position on the trail. Riders also get a transition period at the top of each climb before completing their downhill time trial. Many riders will carry a backpack or fanny pack with water, snacks and a flat kit; something you would never see at a cross-country or downhill race. Enduro racing is laid back and is a great way to get competitive with your friends and meet new riders to bike with.
Since the point of enduro is going downhill bikes here are very downhill oriented. They are at the very end of bikes that are still capable of going uphill. Of course these are dual suspension bikes. Depending on whom you ask, enduro bikes are either at the top end of trail bikes when it comes to travel (usually 150-175mm of travel) or usually a step above trail bikes. They are still not as burly as downhill bikes. They are able to handle steep, technical trails. Some enduro courses feature downhill sections as steep and technical as what most athletes ride on a downhill bike. This is why it was mentioned these bikes can easily be also used in bike parks.
Enduro racing isn’t just for professionals and extremely fit people, but a great way to time yourself against your friends and peers. Everyone competes on the same course, so if you’re a beginner you can see how you stack up against the top athletes’ times and have a goal to work towards. Also with all this talk about enduro racing, it does not have to be racing at all. If you find yourself in this description – you want to ride downhill while going up is just a way to reach the top of the trails, then you should get an enduro bike.
Downhill Mountain Biking and Bikes
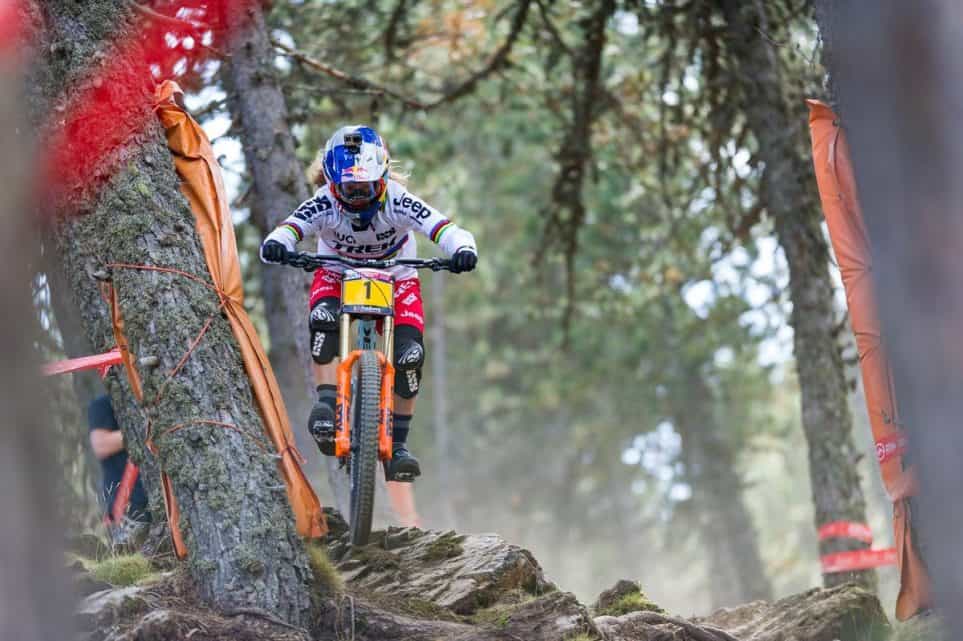
As its name implies, downhill mountain biking is all about the downhill. Downhill bikes are not intended to be pedaled uphill. They are heavy and the suspension doesn’t usually lock out. This sport if for those who enjoy the adrenaline rush of flying downhill on a bike, hitting various jumps, drops and berms.
Downhill bikes are specific for going downhill and pretty much useless when it comes to pedaling, making them different than other categories of mountain bikes. These bikes have the most travel and stiffer suspensions. A downhill bike will have between 180-200 mm of travel, more than any other mountain bike. The bike is designed to charge over roots and rock gardens, and absorb impacts from landing jumps and drops. Rather than air shocks, most downhill bikes use coil shocks since the weight isn’t an issue. Longer wheel bases give the bike more stability, and smaller diameter tires increase maneuverability in technical sections of trail.
Since downhill bikes don’t pedal uphill well, you need to get your bike up somehow. Bike parks maintain downhill trails and provide riders transportation to the top. Many ski resorts run lifts and maintain downhill trails as a way to continue operations throughout the summer. Other areas will offer shuttles to carry riders to the top. If you have enough friends and bike racks you can set up your own bike shuttle system.
Due to increased speed and terrain features, downhill bikers wear more protection. Full face helmet, goggles, gloves and knee protection are common for downhill bikers. As riders attempt more challenging courses and push faster speeds they may wish to wear a back, neck or elbow protection.
In competitive downhill mountain bike races, athletes compete for fastest time down a course outlined by tape. Athletes must choose that shortest, fastest and most efficient route down the trail over roots, rocks, jumps and other obstacles. This is the formula one of mountain biking.
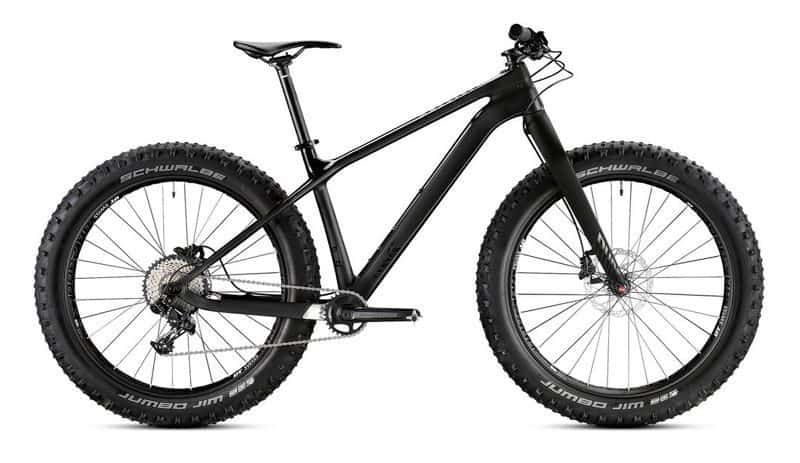
Fat Bikes
If you enjoy mountain biking so much that you wish to do it year-round, fat biking is a way to bike throughout the winter. These bikes have much wider and fatter (four to five inches) tires than your typical mountain bike tire. The increased tire size provides more surface area in contact with the ground, allowing the bike to be ridden through sand and snow. Biking in fresh snow provides a surprising amount of traction, granted you have the proper tires. Fresh snow is essentially a refill of fresh dirt to the trail each time you ride.
Fat biking is a great way to get outside and stay mountain biking shape throughout the winter. Even though you’ll probably use your fat bike less than other bikes throughout the year, the traction and control fatter tires provide is worth it. Many fat bikes can be adapted to fit skinnier tires so you can use them year-round. Other people choose to ride their fat tires throughout the summer.
Some people choose to ride their fat bikes year-round. Wide tires increase fiction and surface area in contact with the ground. This provides greater feel and control on the trail. Fat bikes can boost rider’s confidence, especially beginner riders, on various terrain.
Fat bike are typically hard tail or rigid, meaning there is no front or rear suspension. The increased tire size partly makes up for the lack of suspension. Tires are inflated with lower pressure ranging from 5-14 psi depending on the trail. Lower pressure for snow and sand to increase surface area and greater for rocks. Too high of pressure in fat bike tires can make the bike too bouncy and hard to control on the trail.
E-bikes
Electric motor assisted bikes are bikes that are equipped with batteries and an electric motor that helps you pedal uphill. The motor ads to your pedal power making it possible even for older and less fit people to reach the top of the trails. A fit rider using an e-bike will be able to do more laps on the trails as they would without the motor.
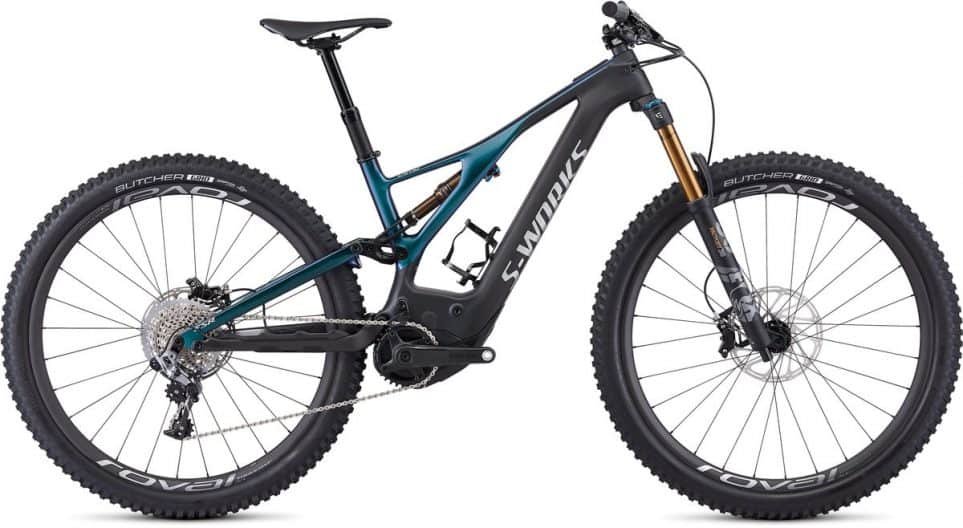
E-bikes range from trail bikes to enduro bikes and even downhill bikes. The downside of e-bikes is the added weight that the batteries bring. These bikes are much heavier making them less playful and harder to ride when going downhill. This is however partly compensated by the lower center of gravity these bikes have due to batteries.
Dirt Bikes
These bikes are meant for jumps on specially built courses that consist of berms, jumps, drops, table tops, wallrides etc… These courses are smooth, sometimes angled downhill and sometimes getting speed necessary for riding comes from pumping on the obstacles on the course. The goal here is to do jumps and tricks like 360’s, backflips, frontflips etc… Competitions here are called slope style competitions.
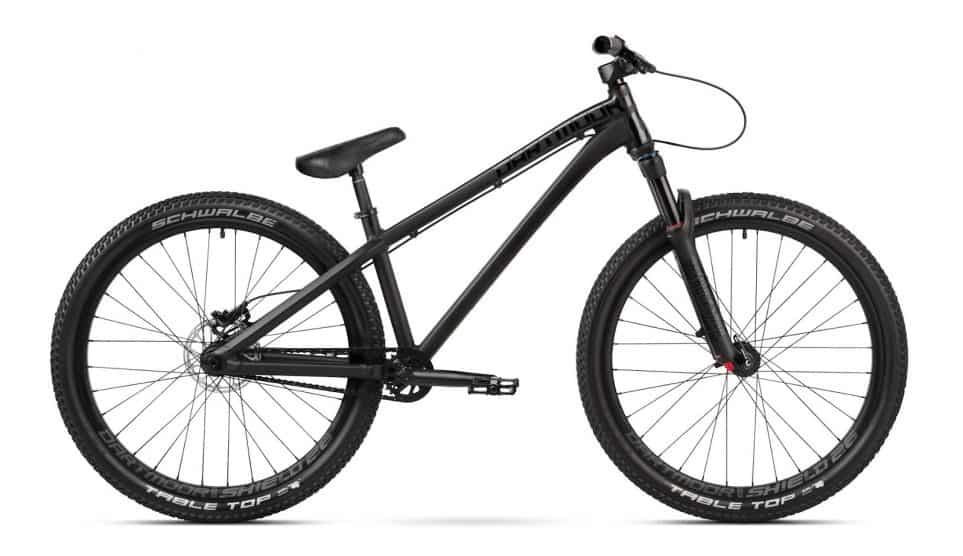
Dirt bikes usually only have front suspension with around 120mm of travel. The back of the bike is hard without suspension so more power is transferred when pumping the bike for speed. The rear end of the bike and the seat are really low so they do not get in the way when doing tricks.
These bikes cannot or are not meant to be ridden on regular trails, so get this bike only if there are pump tracks and jumps around you and you want to hit them regularly.
How to Choose a Mountain Bike?
By now you hopefully understand what mountain biking possibilities are out there, what kind of bikes exist for different types of riding and you know what style of riding you want to do. Now it’s time to choose a bike.
There are a lot of mountain bike companies producing quality bikes out there. With so many companies making mountain bikes claiming to have the latest and greatest technology, it’s hard to know which one is right for you and the choice may seem overwhelming. Every bike company brings something different to the table so there is no right answer which one is the best. When choosing a mountain bike I would say there are two main things to consider. First there is the quality of the bike and second (of the same importance) is how the bike feels to you! Let’s take a look.
Bike Quality
First thing to know is that every mountain bike consists out of bike frame and components. Components are made by different companies than bikes. So bikes from different brands can have same components. What bike companies do is design and produce frames and try to combine them with components into one well-functioning package. Bigger bike brands can work with components manufacturers to adapt some of the components to their bikes. This is great unless something breaks down. Then it is usually harder and more expensive to repair.
Bike Frame
Bike frame with its geometry and angles defines the type of bike. It is the soul of the bike. It defines ow the bike will ride. The rear triangle also defines how rear suspension works on a dual suspension bike. What do you need to know about bike frames? Carbon frames are lighter and more expensive. Less weight at the same performance always means higher price weather we are talking about frames or components. Same frame can be mounted with different levels of components. This means that the same frame design (with the same geometry) is usually the base for 3 to 4 different bike models with different prices.
For instance: an aluminum frame with entry level equipment (cheaper), aluminum frame with mid-range equipment (mid price) and carbon frame with top of the line equipment (expensive). Also, interestingly, bike frames these days are very light. The majority of the weight of the bike lies in its components, not in the frame itself. The frame represents I would say around 1/3 of the final bike weight.
What Falls Under Equipment/components?
Basically everything that is not the frame of the bike. Front fork, rear shock, wheelsets, tires, drive train, rear and front derailleur, brakes, cranks, handlebar, seat, bash guard, grips…everything. The weight and quality of each of these components plays a big part in the final weight, quality and price of the new bike. Since bike brands get these components at mass sometimes the price of the whole bike is cheaper than the sum of the prices of each individual component without the frame if you would buy them separately in a bike shop.
When choosing a bike you will usually end up comparing the components on different bikes. If they feature components from the same manufacturer it is easy. Open the manufacturers website and check what level of equipment is used on the bike. If components you are comparing come from different manufacturers you can still check the level of equipment although they might not be directly comparable.
Size and Feel of the Bike
You should always get the right size of bike for your height. Bike brands usually have size charts that help you choose. If you are in between sizes it is good to know this:
- longer/bigger bikes are more stable at higher speeds and
- shorter bikes are more playful and maneuverable.
If you are not sure what to get I would suggest a bigger bike. A good bike shop employee will be able to tell you if the bike is right just from seeing your position when you are sitting on the bike, so make sure you go into a trusted bike shop where people know what they are talking about. If you have an option to take the bike for a test ride this is even better.
Besides the right size it is also important that the bikes feels right. Some geometries are just better suited for your body type than others. Again, if you can test ride the bike, you can see how it feels. However – every bike you get will take some time to get used to. It is quite possible to order a bike online without testing it first, some of the better bike brands only sell bikes through their website (eliminating the distribution network makes these bikes cheaper with an awesome price/performance)!
So which bike to choose? I have added a few well tested suggestions into each bike category. Generally with well-known and tested brands you cannot go wrong. Some of the bigger mountain bike brands include Specialized, Santa Cruz, Rocky Mountain, Trek, Giant, Cannondale, Yeti, Pivot, Ibis, Evil, Kona, Moondraker, YT, Canyon, Norco, Orange… There are of course many others. Each of the brands caries a variety of bikes from light weight carbon bikes with top of the line parts to entry level aluminum alloy bikes with entry level parts. They usually also make bikes for all styles of mountain biking. Each of them will have a bike that can be great for mountain biking for beginners.
Further down you will find suggestions for every piece of equipment you need to start mountain biking.
What Else Do You NEED to Know About Mountain Bikes?
Dropper Seat
Getting a bike with a dropper seat post is one of the best bike buying decisions you can make. What is a dropper seat post? It’s a seat post that can be raised or lowered with a push of a button on your handle bar. Why is this useful? Because when pedaling uphill you want your seat to be high so your leg is extended when you push on the pedal. Pedaling this way is more efficient, easier and better for your knees. On the other hand, when going downhill you want your seat to be low so it does not get in the way when you move your body over it while you ride (you always ride standing up). Dropper seat post is useful on up and down trails where you transition from climbing to descending multiple times on the trail. With the dropper post you don’t need to stop to adjust your seat height, or have to descend with you seat up. Almost all new bikes now already come with a dropper seat post or to be more precise – typically dropper seats come with trail bikes, especially dual suspension trail bikes. XC and DH bikes rarely have them, because with that style of riding you usually only go one way, up or down.
Wheel Size 26, 27.5, 29
First, what do those numbers mean? It is the size of the wheel in inches, the height of the wheel. So 26″ wheel is the smallest and 29″ is the largest. Not that long ago all mountain bikes had 26″ wheels. Then 29″ and 27.5″ came out and today 26″ is almost impossible to find on a new bike. There are however lots and lots of used bikes with this wheel size. So why the industry went to larger wheels and what is the difference?
Smaller wheels <——> Larger wheels
Faster acceleration <——> Slower acceleration
Less traction <——> More traction
Rougher ride <——> Smoother ride
Lighter <——> Heavier
Better maneuverability <——> Worse maneuverability
Better for shorter riders <——> Better for taller riders
So what all this means is that a larger wheel will be slower to accelerate (but hold speed better), it will give you more traction and a smoother ride as it rolls over the obstacles better, it will be heavier and not so maneuverable around the corners.
That being said, you must understand that as a mountain biking beginner, the difference in size and how different wheel sizes feel when you ride is not that huge. It does not mean that a smaller wheel has no traction or that larger wheel is extremely heavy. So unless you are really small (pick the smaller size wheels) or really tall (pick 29″) just choose what it feels better or what is available and within your budget.
Tires
Brakes and tires are like the most important bike parts for a safe ride if you are more into downhill than climbing. Tires are the only point of contact between the bike and the trail, so good tires and good brakes are a must if you want to control your speed and have fun without breaking bones. A few things you should know here:
- Tire size: Tire size must be right for your wheel size. 27.5″ tires fit on 27.5 wheels. Tire size is usually given with two numbers that give you size and width of the tire. For instance 27.5×2.3.
- Tire width: Burlier, wider tires with bigger knobs will have more grip, but will also be slower and burn more energy when pedaling. For MTB narrower tires are considered somewhere around 2″ and wider tire is somewhere around 2.3″ and more.
- Tire thickness: Thicker tires will be heavier but more puncture and snake bite resistant (snake bite is when you compress the tire so much (when for instance hitting a rock while riding) that the tube gets pinched by the rims. The result are two parallel punctures, that kind of look like a snake has bitten into the tube). Thinner tires are lighter but punctures and snakebites are more common. Thick tires are called 2ply, meaning they are made out of two layers. Thin ones are single ply – one layer. There are also 1.5 ply that are in between. If you are more downhill oriented, get 2ply tires and forget about snake bites.
- Rubber: Rubber hardness and “stickiness”. Tires made of harder rubber are more durable but offer less grip. Tires made out of softer more sticky rubber are worn out faster but offer more grip. Usually the same model tire comes in 3 different rubbers. Hard one for uphill, medium for trail riding, and soft for downhill. If you feel you need more grip, get softer version. Especially for the front tire, you don’t want the front tire to skid as this usually means wiping out.
- Tire pressure. Tires usually have upper and lower pressure limit at which they can be ridden. Lower pressure means the tire better adapts to the trail and has greater contact surface. This gives you more traction. But on the other hand lower pressure also means greater danger of snake bites. So you will have to find your ideal riding pressure for the trails you usually ride.
- Tubeless ready. Most tires today are tubeless ready. This means you can set up your wheels without an inner tube. Apart from tires you will also need a special air valve and a liquid called milk that you put inside the tire. Milk is a glue like substance that seals all the holes and prevents the air from escaping from inside the tire. Milk will also seal punctures from thorns etc… that you get while riding. So if you are tired of changing punctured tubes maybe you can try tubeless. On the other hand milk inside the tires makes the system really messy.
How to Set Up Your Mountain Bike Before the First Ride and What Else Do You Need?
Setting Up Your Suspension
The basic setting here that you MUST do (and it will be usually done in the shop) is setting the stiffness of the suspension to your weight. With air suspension you can buy a special pump and set the pressure yourself but as a mountain biking beginner it is better to ask someone to do that for you. Either ask at the bike shop or ask one of your mountain bike friends. Depending on the quality of your suspension there will also be other settings that you can adjust on your suspension. The most common one is rebound – how fast the shock returns to its initial state after being compressed. As a beginner it is best to just ask at the shop to set these for you as well in a neutral state for your weight.
Tire Pressure
Check tire pressure. Mountain bike tire pressure should be somewhere between 25 to 35 psi. Wider tires can have lower pressure, narrower need higher pressure. Recommended max and min tire pressure is usually also written on the side of the tire. In a while you will know what tire pressure you need for your weight, style of riding and trails that you usually ride. Some mountain bikers also pump up their tires when going up for less rolling resistance. And then let the air out before going down for more grip (I don’t, I’m too lazy).
Pedals
This was really weird to me, but a new mountain bike, when you buy it, it always comes without pedals. Or there are some cheap ass plastic pedals that are barely good enough to ride the bike out of the store (never use these for riding). It can be a 7,000$ mountain bike, but no pedals:). I am still not quite sure why this is so, I guess pedals are a personal decision since they are one of the three contact points between you and the bike (seat, grips, pedals) and the one that is the most important for riding your bike downhill. So what do you need to know about pedals?
- Buy them together with your bike or you will not be able to try your new bike when it arrives and that sucks big time!:)
- There are two types of mountain bike pedals: flat pedals and clipless pedals
- Clipless pedals: clipless pedals fix your foot the the pedal so it does not move, it is always in the same – correct position and give you more control of your bike. Their downside is that you need to get used to them so you can clip out quickly and at will when you need to stand down from the bike. Which can be a problem. For this system you will have to buy pedals as well as special shoes that attach to these pedals. Riding clipless on a mountain bike especially on more technical trails is not something a beginner should do. Unless you are coming to mountain biking from road biking and you are already comfortable riding clipless I would not recommend them to mountain biking beginners. Most of the people you meet riding will ride flat pedals.
- Flat pedals (flats): your feet are not attached to flat pedals, you just stand on them. To avoid slipping and moving of the foot flat pedals have metal pins (basically screws) pointing out of the pedal that fix your foot in place via traction. Pins in combination with mtb shoes that have special rubber soles with lots of grip will keep your foot in place. Of course, you can also ride flats with any regular shoes (a bit more on bike shoes later). Since your foot is not attached to the pedal you can stand on them in a wrong position (usually you want to stand with balls of your feet in the center of the pedal) and in worst case you can slip off. This is where pins become your worst enemy as they can hit your shin and make damage. But you can step down from your bike anytime you want which is extremely important when you are learning – you will be stepping down a lot. And even later, you will step down intentionally and unintentionally in technically more difficult situations. The problem with clipless pedals is that you usually need to disconnect from the pedals in critical situations. When you are in a difficult place on a trail, when you are wiping out etc…and when it is especially important that you step of quickly. If you can’t you can crash or crash even harder. Anyway, riding flats or clipless is a personal choice.
- Lighter pedals are better and more expensive.
- The size of the platform, the part of the pedal you are standing on depends on the size of your feet and your personal preference, usually larger pedals give you more confidence.
Quick Mountain Bike Maintenance Tips
We are not all technical types. You know, people that that enjoy taking their bikes apart, cleaning them, putting them back together etc… People who consider this fun and love to do it in their spare time. Some of us simply enjoy riding and maintenance is just a nuisance. But even if you have two left arms like I do and no technical knowledge and desire, there are a few things you should do:
- Every now and then, check that everything is tight, that no screws are loose, it’s for your own safety. Things to check:
- check that wheels are tightened,
- brake and shift levers on the handlebar are tight (this are one of the most common things to get loose)
- every now and then check that the spokes are firm (if they are loose it’s service time)
- Every now and then check the brake pads, when the thickness of the “meat” on the pads get to 1mm it’s time for new pads, buy a few pairs of extra pads and always have them available. If you wear them down too much the metal will destroy your discs. Learn how to change the pads yourself.
- Lube the chain, the correct way to do this is to lube the chain from the inside, turn the pedals a couple of times, change gears a couple of times and then WIPE the chain clean with an old cloth or something similar. The idea is to get the lube into the chain links, not on the chain itself. Lube on the chain has no other purpose than to attract dirt.
- Wash your bike a few times a year. Pressure washer works great, but make sure you don’t direct high-pressure water spray into the places (at least not for a long time) where there are bearings. Water can get inside, bearing can rust, and you will have service on your hands.
- Get a mountain bike multi tool and carry it with you at all times when riding. You never know when something will come loose and multi tool will save you.
- Check if your wheels are straight. Crooked wheels are barely amusing at low speed and create dangerous wobbles at high.
- If something is wrong with your bike, like for instance if your wheels need wheel truing, take the bike to service shop before the problem gets worse. Some things can be fixed if you are quick, but if you keep riding might need replacement. Even if nothing is wrong with your bike, a full suspension bike needs suspension service around once a year, so do that and suspension will thank you.
- If your brakes stop working or are not working as they should and the brake pads are ok, then they probably need bleeding. Brakes use brake oil to transfer the pressure from the brake lever to brake calipers. Bleeding brakes means changing this oil and removing possible air bubbles in the brake fluid.
That is about it.
Mountain Bike Protection and Other Gear
Usually, when you buy a new bike and new pedals you think that the expenses are over. Wrong. Not even close. Mountain biking is an inexpensive sport once you have all the necessary equipment, but when you are starting out the list of expenses is long. And especially with protection gear this is not something you can “buy next year”. You will need most of these things together with your new bike. Here is what you need and what you need to know about each piece of equipment.
Helmet
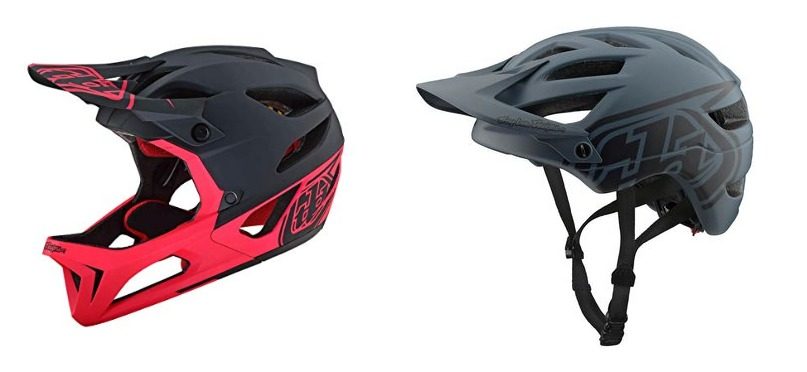
There are two types of helmets used in mountain biking. A full face helmet and a regular (open face) mtb helmet. Full face helmet has protection in front of your mouth so you don’t loose your teeth and looks if you crash head first into some rocks. Now, people usually only use full face helmets when they go into bike parks but personally I do not see the difference in falling on your face in a bike park or on the hill behind your house. So why not wear a full face helmet at all times?
A full face helmet will give you complete head protection. So why don’t people use full face helmets all the time? Because they are heavier and hotter that open face helmets. Even the most ventilated full face helmet is way hotter that an open face one. If you want to keep your helmet on at all times, when going up and going down and avoid putting it on when going downhill and taking it off when going uphill then get an open face helmet. If you value your teeth and looks above all else then get a full face helmet.
There is also a third option. Recently helmets with removable mouth protection became available. Actually, they were available for a long time but were but ugly and complicated and no one bought them. But these days they look pretty good and the removable part is easy to attach/detach.
What to look for in mountain biking helmet:
- Weight: lighter helmet is better and more expensive (carbon=light). Lighter helmet puts less strain on your neck muscles.
- Fit: helmet must fit or it wont do you much good. What is a good fit? If you grab the helmet by the chin guard while it’s on your head and pull it left and right your head should move together with the helmet.
- Ventilation: mountain biking is usually done in summer and in nice weather. The inside os a full face helmet will get hot and sweaty. So you want as much ventilation as possible.
- Protection: helmet should have the required certificates that confirm that the helmet was tested and will help if needed.
When to buy it: Whatever helmet style you choose, mountain bike helmet should be something you buy together with your mountain bike. Don’t play with your life and ALWAYS wear a helmet when mountain biking.
Goggles
A few things you need to know about mountain biking goggles:
- Mountain bike goggles and MX (motocross) goggles are the same.
- If you are used to goggles from skiing and snowboarding, the biggest difference is that mountain biking goggles are clear or very lightly tinted. This is because mtb trails especially when in the woods are way darker than snow covered slopes.
- Layers of foam arounf the goggles are thick so they wick away sweat.
- Fogging can be a problem, but good goggles should not fog when you are riding and there is air flow through the goggles.
- MTB (and MX) goggles have tear-off posts on the side. These are little dimples that hold the tear offs in place so they don’t fall off. What are tear offs? Transparent foil in the shape of goggles lens that protects the lens from scratches and can be torn off the goggles in muddy conditions once there is so much mud on them that you can not see anymore. In this case (mud) you will have more layers of tear offs on your goggles.
Knee Guards
Knee guards are another essential part of protection that you should have. What do you have to know about knee guards?
- There are short knee guards that only protect your knees.
- There are longer and long knee guards that also protect your shins. Your shins usually get hit either by rocks shooting up from under your wheels or by you flat pedal pins when you slip of the pedals, wipe out or accidentally kick them while walking next to your bike. Beginners should consider getting longer knee guards although they are pretty rare these days.
- Thicker and heavier knee guards are meant for higher speed, downhill mountain biking, lighter ones are more from easy trail riding. Why wouldn’t you want all the protection you can get? Again, thicker knee guards are less flexible and hotter. So you have to remove them going up.
- Fit is everything. Knee guards should feel snug on your leg and should stay in place when you wipe out. If you turn them around and slide them off easily even when they are tightened they will do you no good when you crash.
When to buy it: Best together with your bike.
Elbow Guards
Elbow guards are usually worn in bike parks and on more technical and rocky trails. Although, as a beginner you should consider wearing them at all times until you get more comfortable on your bike. What do you have to know about elbow guards?
- Thicker and heavier elbow guards are meant for higher speed, downhill mountain biking, lighter ones are more from easy trail riding. Why wouldn’t you want all the protection you can get? Again, thicker elbow guards are less flexible and hotter.
- Fit is everything. Elbow guards should feel snug on your arm and should stay in place when you wipe out and while riding. If you turn them around and slide them off easily even when they are tightened they will do you no good when you crash. At the same time they should not constrict your blood flow or your arms will get tired faster when riding.
When to buy it: When you are buying knee guards get elbow guards as well. If you want to save some money, these can wait a bit.
Gloves
Gloves have two purposes. They protect your palms when you crash and fall on your hands (which you will) and they soak up the sweat. Most of pro riders don’t wear gloves, but as a beginner you definitely should. Imho, simple gloves without gels work best. Make sure they fit and that the fabric on your palm doesn’t t fold when you hold the grips or you can get blisters. Also, make sure the gloves fit your bike color:)!
When to buy it: Together with your bike. These are cheap, so it makes no sense to wait.
Mountain Bike Shoes
You can ride your bike in regular skate shoes. Sooner or later you will want to invest in a pair of mountain bike specific shoes. That is if you did not go with the clipless pedals (in this case you will need new shoes right away). So why do you need mountain bike specific shoes?
- Special sticky rubber on the soles. You want your shoes to grab hold of the pedals and “never” let go. It makes a big difference in confidence and control when riding. Mountain bike shoes have soles made out of special grippy rubber and it makes so much difference you would not believe it.
- Harder soles. Regular shoes are soft and will bend when pedaling. Harder soles give more power to the pedals when going uphill. Mountain bike shoes must be a compromise between hard soles good for pedaling and softer soles that are still ok for walking. Because when you will start exploring different trails, especially steeper and more technical ones your will also do a lot of walking.
- Harder shell over your toes. You will hit things with your shoes while riding, sooner or later. And when you hit a tree stump, a root or a rock you want some protection in front of your toes so you don’t brake them.
- Extra features are velcro’ed cover for the shoe laces. These prevent the laces from getting stuck in your chain. Another one is higher ankle protection.
The best shoes with the best grip are made by a company called 5.10. True, they are mostly ugly, but the grip is phenomenal (they also make rock climbing shoes). Most of the mountain bikers wear 5.10s.
When to buy it: When you have money, but when you see the difference you will be sorry you did not buy them sooner.
Downhill Protection: Neck Brace and Body Armour
If you will spend a lot of time in bike parks going full speed and hitting jumps there are two more pieces of protection you should get.
Neck Brace
A neck brace is a special brace around your neck that stops the helmet from bending your head too much or from compressing your head into the body when you crash. Sounds nasty, I know.
Body Armor
A full body armor will protect your back/spine, your chest, your shoulders and elbows. You can combine it with padded pants that will also protect your hips. There are also lighter versions that cover less body parts or just back protectors.
When to buy it: it’s up to you, but when it is too late it is too late :/
Mountain Biking Backpacks
There are a couple of reasons why you need a mountain biking backpack:
- Some backpacks include back protectors, so your back is a little bit safer when you ride
- All mtb backpacks have space for water bladder. This way you can drink from a tube without stopping and taking off your backpack
- Backpack can store your helmet/protection while pedaling up
- They will have special compartments to store your spare tubes, air pump, multi tool etc…
- Place for your snacks and extra clothes and
- They are designed to stay in place and not move around when you are riding.
To learn more about choosing the right mtb backpack check this article.
When to buy it: it can wait, when you have money.
Mountain Biking Beginner Shopping List
A list of all the things you need to start mountain biking and some things that are not 100% necessary when you begin, but you will soon want to add them. I tried not to give too many options for each product, so you don’t get lost in too many choices. Suggested buys are really high quality and tested products that you can not go wrong with. Most of them I have either owned myself, I have some friends that own them, or are really highly recommended by some of the leading mountain biking magazines.
Trail Bike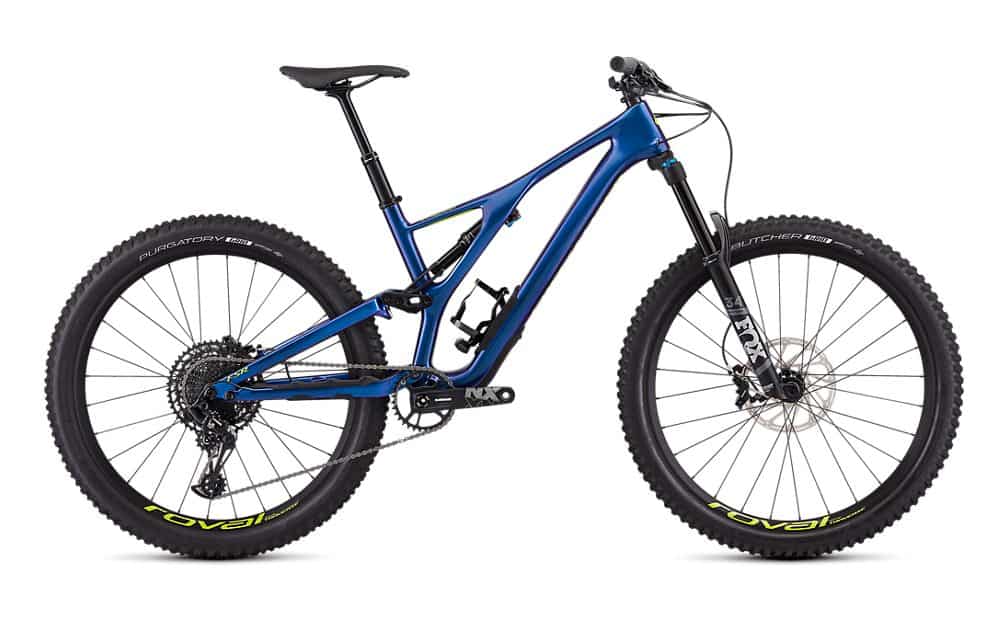
Specialized Stumpjumper is a bike that you can not go wrong with. One of the best rated bikes from one of the most recognized bike brands, you know you will not be disappointed. Stumpjumper comes in many variations. You can get it with carbon or M5 alloy frame. You can get it with either 27.5 or 29″ sized wheels. And there are loads of equipment packages to choose from. Depending on what you choose the price varies, but even with the cheapest model you are getting a really good bike. Stumpjumper is a dual suspension bike with 150mm of travel meaning it can take it all. It’s one of the best all round bikes out there. If you are looking for alternative also check Santa Cruz Bronson.
Enduro Bike

Most of people I know are more into downhill part of mountain biking, going uphill is just a nuisance to get to the start of the trail. So enduro type bikes are really popular here. And one of the most highly praised enduro bikes is the Santa Cruz Nomad. I haven’t heard one bad thing about it, it again comes from one of the most well known bike brands out there and again, as with the Stumpjumper, with Nomad you can not go wrong!
MTB Pedals
| Model | Description | Price |
|---|---|---|
HT PA03A Platform Pedal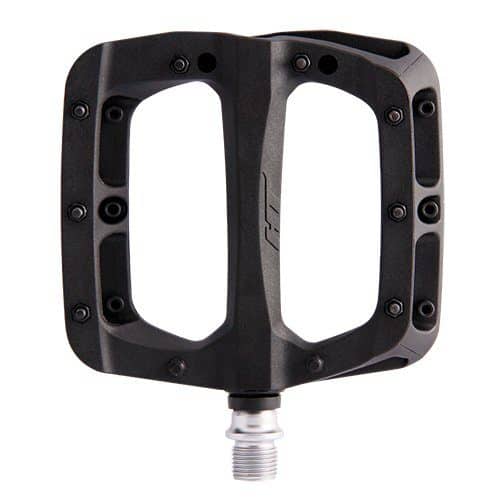 | Light, cheap and strong! | Check price |
| Shimano PD-MX80 | Heavier that average but one of the most are robust and super reliable pedals out there. Just put them on and forget about them. | Check price |
Deity TMAC pedals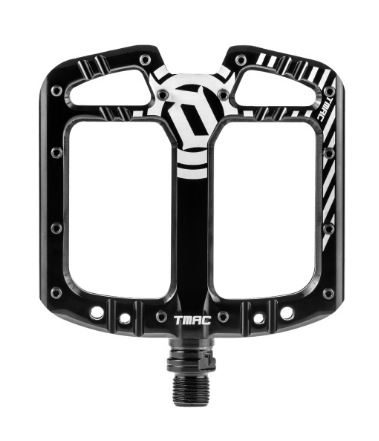 | If you want the best big and concave platform pedals, this is it! | Check price |
| Shimano PD-M530 SPD Clipless | One of the most popular clipless mountain bike pedals out there. Simple and reliable. | Check price |
Crankbrothers Mallet Clipless Bike Pedals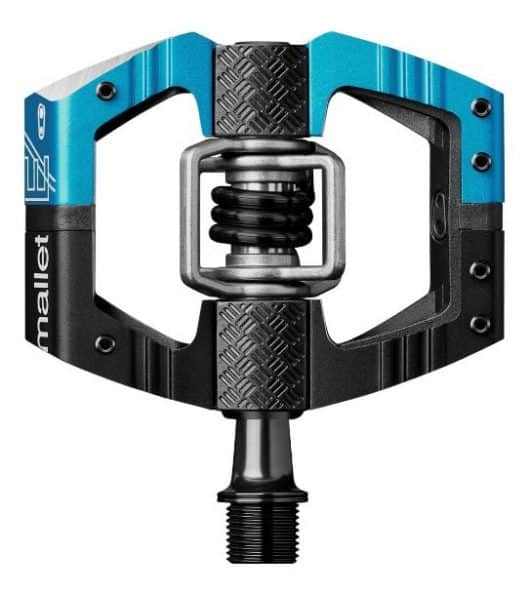 | These pedals are high performance enduro/DH clipless pedals that work especially great with DH-style shoes. | Check price |
Helmet
| Model | Description | Price |
|---|---|---|
TLD Stage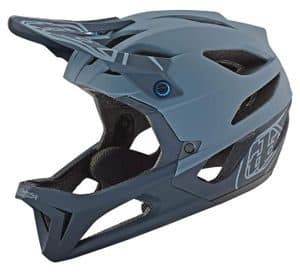 | Very comfortable and extremely well ventilated. | Check price |
FOX ProFrame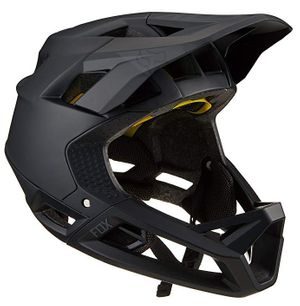 | Very well ventilated and light weight. | Check price |
Leatt DBX 4.0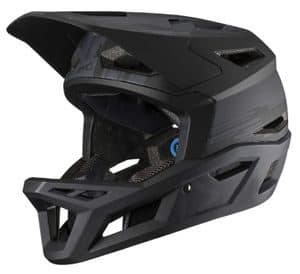 | Very comfortable and stable fit, a bit heavier and hotter. | Check price |
7iDP M2 helmet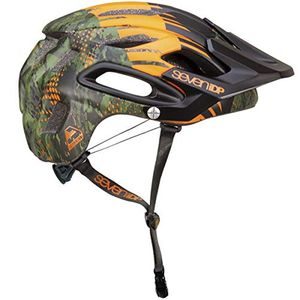 | Cool looking and comfortable helmet with an affordable price tag. | Check price |
Bell Super 3 helmet | Two in one. Great helmet that can be used either as an open face or as a full face helmet with its removable chin bar. | Check price |
Knee Guards and Elbow Guards
| Model | Description | Price |
|---|---|---|
Dainese Trail Skins 2 Knee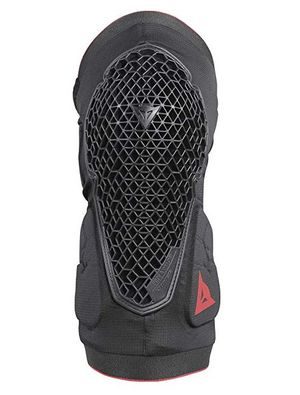 | Not cheap but Dainese really know how to make protective wear. Comfortable and top level protection. | Check price |
POC JOINT VPD 2.0 Knee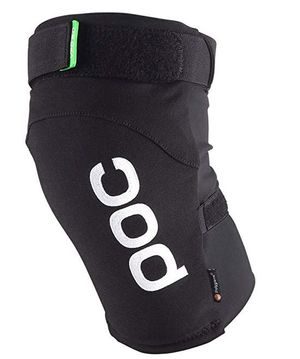 | Great freedom of movement and exceptional impact absorbency. VPD material warms and adapts to the shape of the body, providing freedom of movement, but when exposed to impact, the material hardens. | Check price |
POC VPD Air Elbow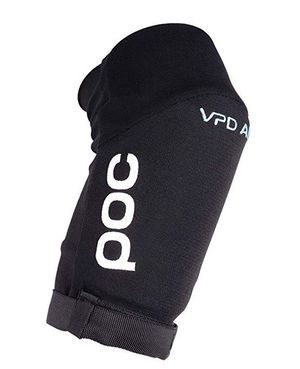 | Comfortable, light and durable. Same material as with POC knee protector. | Check price |
Race Face Ambush Elbow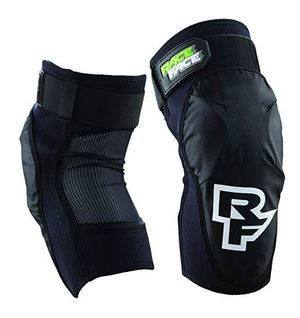 | Very comfortable and secure, as long as you get the size right. | Check price |
MTB Gloves
| Model | Description | Price |
|---|---|---|
100% Ridecamp Gloves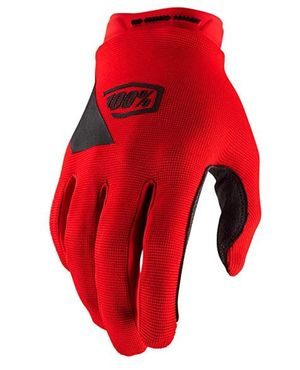 | Snug and stretchy fit with toweling to wipe away sweat. All-rounder at a great price. Other colors available. | Check price |
Troy Lee Designs Sprint Gloves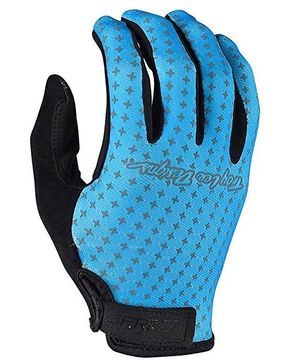 | Light weight and minimalist design. Other colors available. | Check price |
Shoes
| Model | Description | Price |
|---|---|---|
Five Ten Freerider Pro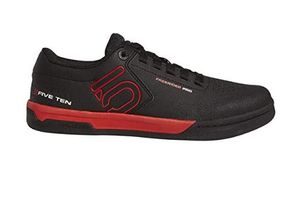 | For rough downhill trails and for people that don’t like being clipped in this is by far the most popular choice. Five Ten Freerider shoe is like a standard. Like all 5.10 shoes it features their legendary sticky Stealth rubber. The Pro version has a stiffer sole than a regular version. | Check price |
Five Ten Impact High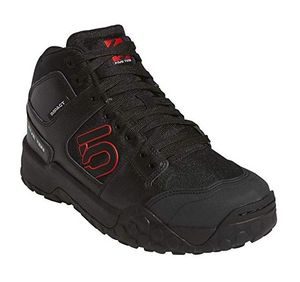 | For the most aggressive trails, pushing your limits in the bike park, or riding in inclement weather. Also comes in low version. | Check price |
Goggles
| Model | Description | Price |
|---|---|---|
Fox Racing Main 180 Race Goggles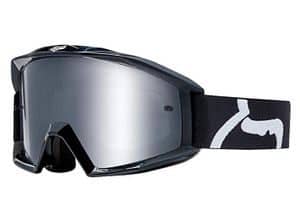 | Large view port and triple layer face foam for taking away the sweat. Cheap and Amazon best seller. | Check price |
100% Racecraft Goggles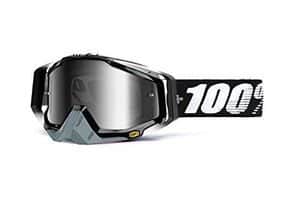 | Top of the line goggles with great ventilation (almost no fogging), comfortable to wear, fits most helmets and comes with clear and tinted lens. | Check price |
What Else You Need
| Model | Description | Price |
|---|---|---|
Multi tool: Topeak Mini Pro 20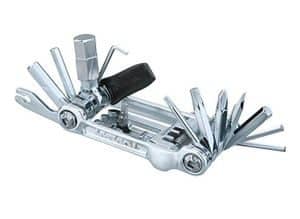 | A mini multi tool is a must. Things can get loose or brake down while you are riding and closest service shop or even your car can be far away. You will need to do some simple repairs yourself. For this you need a mini multi purpose tool that has most of the commonly needed tools in one simple and light weight package. Topeak Mini Pro is easily one of the best tools out there. | Check price |
Mountain bike tire pump: LEZYNE HP DRIVE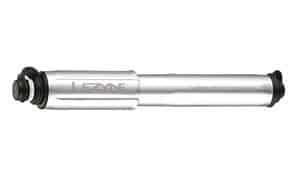 | One of the most common things you will need to repair on your bike while on trail is a punctured tire (tube). For this you will need a spare tube and a pump. One of the best pumps in the market is Lezyne HP Drive. | Check price |
Tire Levers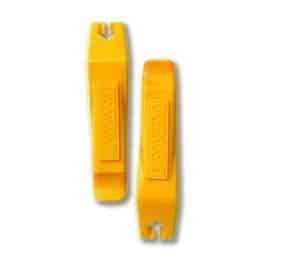 | You will need these to get the tires of the rims and replace or patch the inner tube. Get a sturdy pair like these, you will need them to get those tubeless ready tires off (#$%!?#) | Check price |
Tire Patches | Tire patches take way less space in your backpack than spare tubes do. So usually you take one spare tube and in case of more than one puncture in a day you use patches to fix the tubes. This is a nice set, don't get those self adhesive ones, in my experience they only work temporarily. | Check price |
Air Suspension Pump: Birzman Macht | When your suspension needs adjusting you will need a suspension air pump (not same as tire air pump). Since problems usually rise when we start riding, this fully-featured, sturdy aluminium pump comes in a package that still easily fits your backpack. | Check price |
This is pretty much it, if you have any additional comments or questions, leave them in the comments. And if you find this guide useful please share it. I would really appreciate it since it took me ages to write it :).
Also, here you can find a few more MTB posts that are must read for beginners and people looking for MTB trip ideas:
- 6 Beginner Mountain Biking Mistakes Everyone Makes
- Best Bike Light Setup For Mountain Biking
- Dolomiti Paganella Bike Check: MTB Gem Under the Brenta Dolomites
- Sardinia Campervan Tips: Van Travel Tips, Things to See, Things to Do